
A Jira issue is a particular task, defect, or unit of work inside a Jira project. Jira issues are created by the user/team to log bug fixes, new features, improvements, or tasks. These are created directly in the Jira project. This post will give step-by-step information for Jira integration within Salesforce Apex and create a Jira issue from Salesforce.
Jira is a popular project management tool.
Use Case for Jira Integration in Apex
Create a Jira issue from the Case record when the button ‘Create Jira Issue’ is clicked. Get the issue id after creation and put that in the Jira ID field.
Solution
To create a Jira issue in Salesforce, we will use the Jira REST API. We can integrate Jira REST API using Apex and Salesforce Flow. For this post, we will use Salesforce Apex to integrate Jira.
We will create a Custom Metadata type for storing Jira information like project, issue type and due date. This information will be used to integrate and create issues in specific projects. We will also add one field JiraId in the Case object to update the generated Jira Id. This Jira id can be used later for retrieval for reporting purposes.
Implementation
To implement this we have to follow these steps
- Create Named and External Credential
- Create custom metadata type
- Create Apex Classes for Jira Integration
- Create an Apex Invocable class
- Create a flow to call the apex method from the Button
- Create a button to call Flow
- Test Functionality
Let us handle each step to complete integration with Jira.
1. Create Named and External Credential
We will require a named credential for a secure connection between Salesforce and Jira. Follow steps 1 to 5 from the blog post, Verify API Connection in Flow HTTP Callout to create named credential, external credential, named principal, and permission set. Assign permission set to your user or required user. Assigning a permission set is mandatory for the user. If not assigned, the user can’t complete integration.
For this post API URL is – https://salesforcecodex.atlassian.net/rest/api/3/issue/. It will be different for you, check it Jira project.
2. Create custom metadata type
Create a custom metadata type Jira Configuration (JiraConfig__mdt) to store Jira project information. Create below metadata fields
| Field Label | Field API | Data Type |
|---|---|---|
| Due Date | DueDate__c | Number(2, 0) |
| Issue Type Id | IssueTypeId__c | Text(20) |
| Project Key | ProjectKey__c | Text(20) |
Add the below record in this metadata object.
| Label | Jira Config Name | Due Date | Project Key | Issue Type Id |
|---|---|---|---|---|
| PRJ1 | PRJ1 | 7 | SFDCTEAM | 10004 |
If you have multiple projects, you can add all of them and use them in Apex accordingly. This information will be different for you, so add information accordingly.
3. Create Apex Class for Jira Integration
Create below apex classes for integrating Jira.
- BaseException – Common exception class.
- Jira – It is a data transformation class.
- JiraResponse – It is a callout response wrapper class.
- JiraService – This class holds code for the Jira API Integration.
- JiraTaskController – It is a controller class to call JiraService apex. It will get metadata information and current record information to use in Jira issue creation.
Based on the above classes it will return the below JSON response which will be deserialzed using JiraResponse class.
{
    "id": "10005",
    "key": "SFDCTEAM-6",
    "self": "https://salesforcecodex.atlassian.net/rest/api/3/issue/10005"
}
4. Create an Apex Invocable class
As we need to create the Jira Issue on the button click, we have to call the above classes from the button. We can not call the apex class directly from the button, we need to call this class from the Lightning component or Screen flow. We will use screen flow for this purpose.
To use the apex class in flow, we need to create an invocable apex class. Create the below apex that will be called from the screen flow. Method createIssue will call JiraTaskController to create an issue based on the passed parameter from the flow.
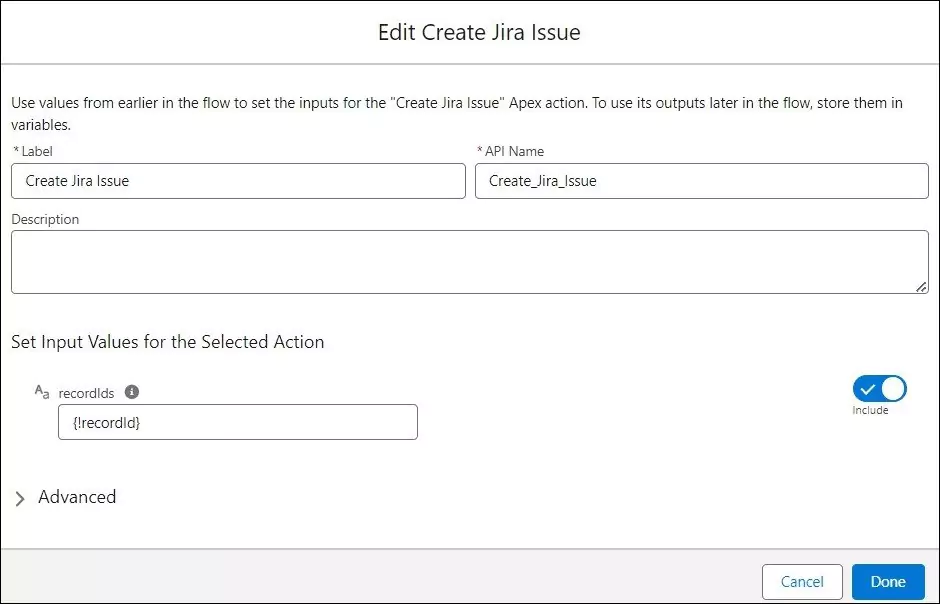
5. Create a Screen Flow to Invocable Method
Create a screen flow Jira Issue Creation and add action on it. On action select above created Invocable Method Create Jira Issue. This action requires a current record id for method execution so create a text variable with the API name recordId. The variable should be marked checked for Available for input.
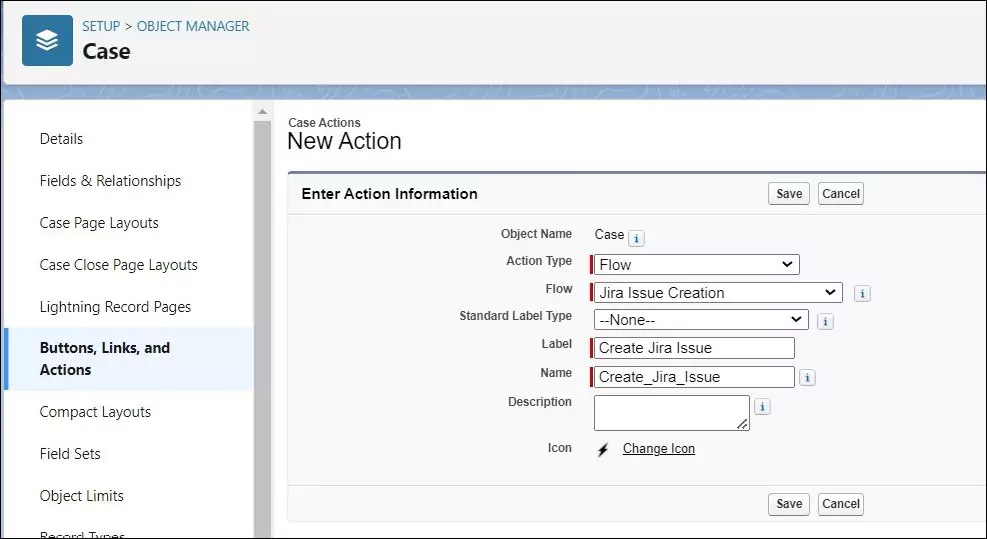
6. Create an action button on the object
Create an action button to create Jira issue on the case object. This button will call the above-created screen flow.
| Label | Create Jira Issue |
| Action Type | Flow |
| Flow | Jira Issue Creation |
| Standard Label Type | –None– |
| Name | Create_Jira_Issue |
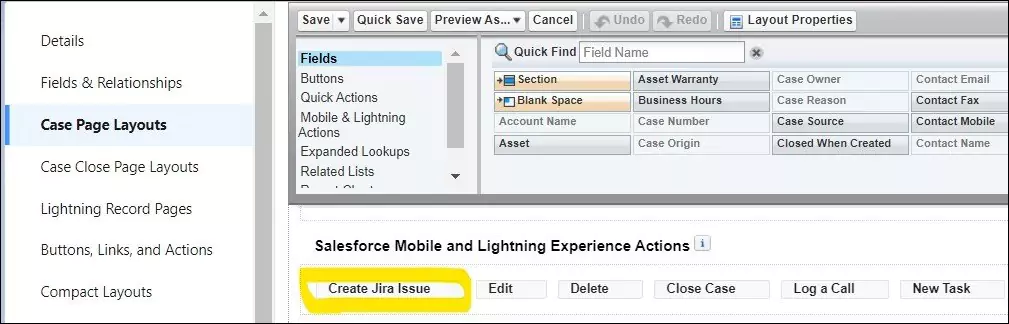
7. Add a Button to the Page Layout
Add the above-created action button to the page layout. This button will call flow to execute API Integration.
8. Test Jira Integration
Check this video for a demo of Jira Integration.
References
The Jira Cloud platform REST API
Verify API Connection in Flow HTTP Callout
Similar Posts
Accessing External Credential Parameters of Named Credential in Salesforce Apex
Configurable Record Picker in Lightning Web Component
Displaying Tabular Data with GraphQL in Lightning Web Component
Dynamically Instantiate Components in LWC
Seamless YouTube Video API Integration in Salesforce
GraphQL Query Generator in Salesforce Apex
Capture Images in Salesforce using Mobile App
Need Help?
Need some kind of help in implementing this feature, connect on my LinkedIn profile Dhanik Lal Sahni.