
Many times, we need to integrate external systems to pull information about the created customer or their transaction details. On data retrieval, we create a similar record in Salesforce so that both systems are in sync. This can be achieved using both pull and push technology. In pull technology, we can create batch jobs to pull external system information and it will run at a set interval of time. With push technology, an external system can push information to salesforce when a certain event is created in their system. We can use Salesforce Webhook/Platform Event/API for pushing information to Salesforce. We will use Salesforce Webhook to sync both Salesforce and the external system. In this post, we will do Shopify integration with Salesforce using Webhook to sync shopify customer data. We can utilize the same concept with other external system integration which supports webhook notification.
A webhook is an HTTP-based callback function that allows lightweight, event-driven communication between 2 application programming interfaces.
Using pull technology we have a problem, it will sync data only when the job will run so it will not be real-time data sync. In push technology, data will be synced as soon as an event is raised.
Read More: The Ultimate List of Salesforce Integration Resources
Use Case for this post
We have an e-commerce platform that is using Shopify for its day-to-day operation. Customer, order, refund everything is saved in Shopify. Business wanted to sync complete data in Salesforce. For this post, we will create customers as soon as customers are created in Shopify. For other data, a similar process can be implemented.
Solution Implementation
Let us use Salesforce Webhook to sync data between Shopify and Salesforce. To implement a complete solution we will do the below tasks.
- Create Apex REST API
- Make Apex REST API publicly accessible
- Setup Webhook in Shopify
- Test Implementation
1. Create Apex REST API
As we have to sync data between Salesforce and Shopify, we will create a REST API that will create customers in Salesforce. This API will be configured in Shopify Webhooks. To create API we need a sample request JSON that will be sent by Shopify on customer creation. You can take sample request JSON from here.
Let us create an Apex serialization class for the above sample request JSON.
Let us create Apex REST API that will create customers in Salesforce. This REST API will consume the above apex wrapper class to get Shopify record data.
For this post, I have used only standard fields for account record creation. You can add other fields based on your requirement.
ApplicationException is a common exception class to log issues in a custom object. You can check our post Exception Logging in Custom Object : Salesforce Apex for complete detail about exception logging.
2. Make Apex REST API publicly accessible
We have apex REST API now and we can consume it with proper authentication. To use as Salesforce Webhook, this API should be publicly accessible. To make it publicly accessible, we can create a Salesforce site using Setup->Sites.
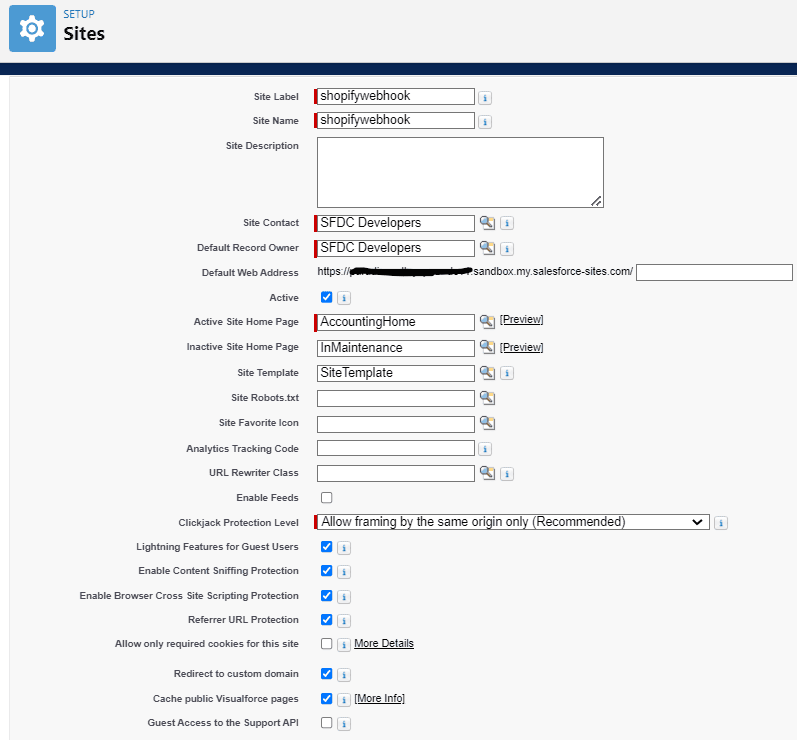
Create a site shopifywebhook and set detail like the below image.
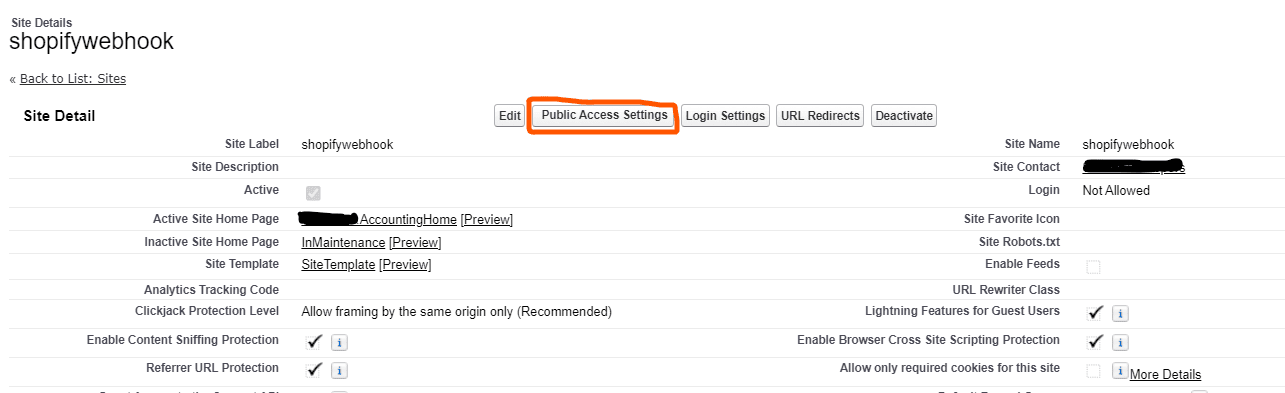
When we click Public Access Setting, it will open a guest profile for the site. Select all apex classes in the section Enabled Apex Class Access that needs to run when API will be accessed by Shopify webhook. Provide object access as well for the objects, for this post we need to give read/create access for Account object.
After the above configuration apex REST API will be publically accessible.
Note:
For security reasons, you can check Shopify headers to verify that webhooks request is sent by the correct Shopify store. You can check the below headers for verification.
X-Shopify-Topic: customer/create
X-Shopify-Hmac-Sha256: XD5454y6OsLMeiZKwP4FppHH454534535eH5Jo4bM= (sample)
X-Shopify-Webhook-Id: b54557e4-bderered9-4b37-8a5f-bf7d70bcd043 (sample)
3. Setup Webhook in Shopify
Our REST API is now ready for use. Let us go into Shopify and set up this API in the webhook notification.
Open your Shopify store as an Admin user and go to the settings section. In the notification menu, we will get all webhook notifications.
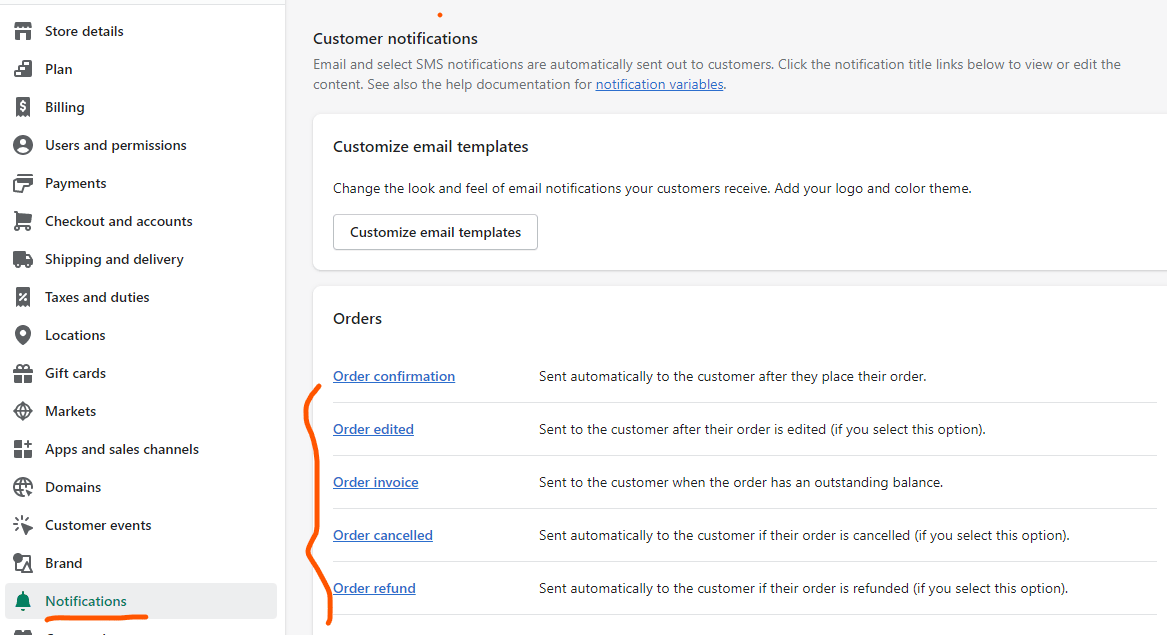
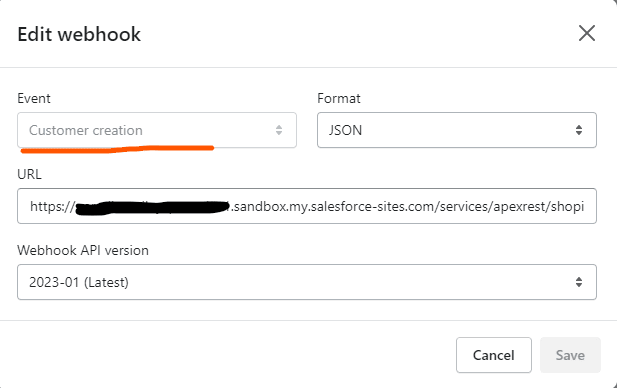
Setup API URL for Customer Creation notification. We need to set up the URL which we have created in our Apex REST web service.
We have created Apex Rest Resource – /shopify/webhook/v1/customer
so complete URL will be https://{org-instance}.sandbox.my.salesforce-sites.com/services/apexrest/shopify/webhook/v1/customer
4. Test Shopify integration with Salesforce
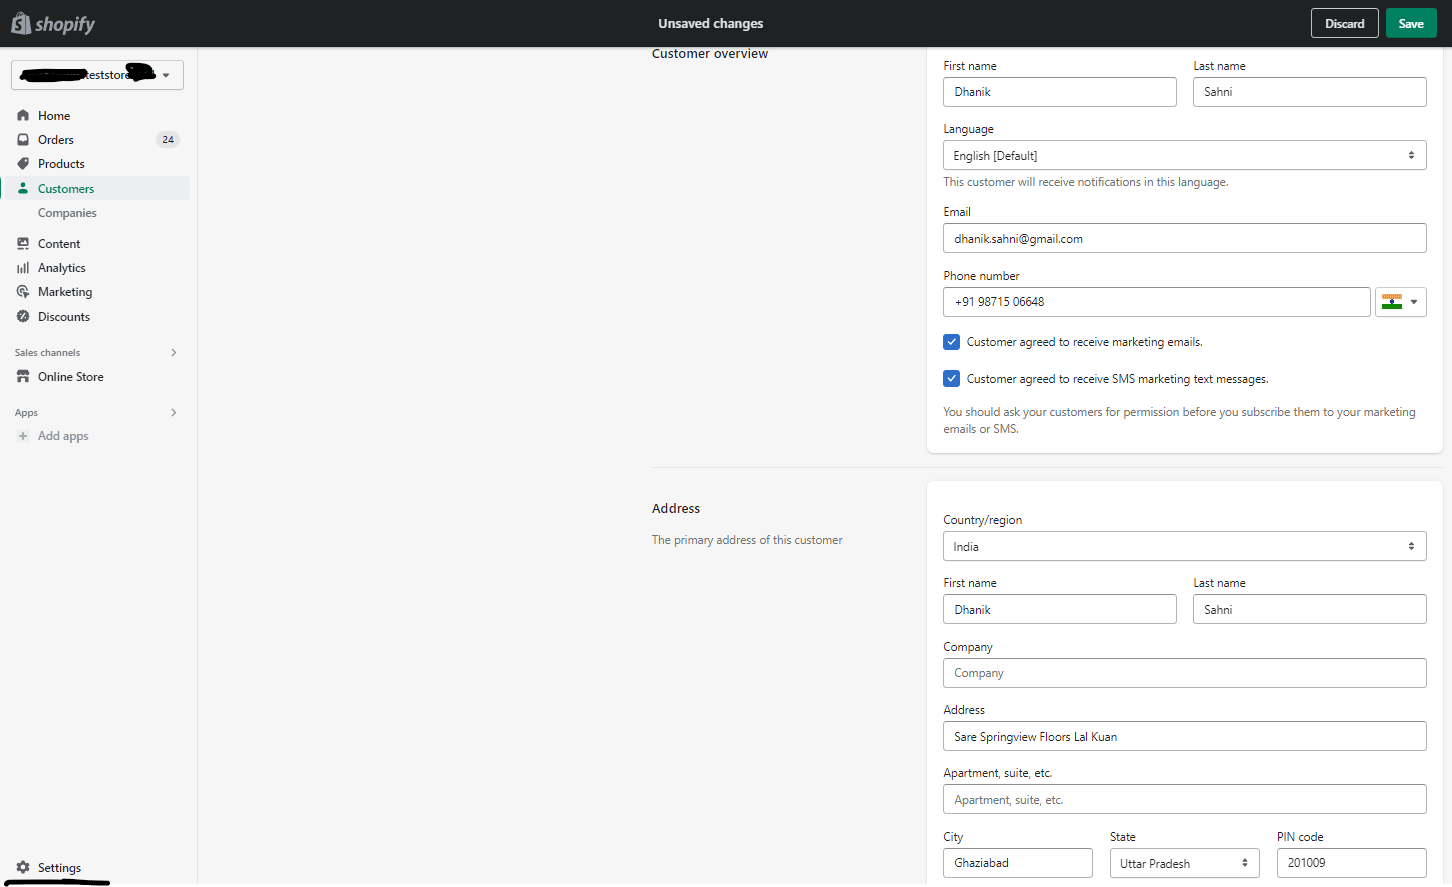
Let us test the above implementation by creating customers in Shopify. Provide all required customer information to create a customer.
Once a customer is created in Shopify, it will create a customer in Salesforce.

References
- Webhook
- Stop Serialization and Deserialization of Object In Apex
- Exposing Apex Classes as REST Web Services
Similar Posts
- Using Salesforce Bulk API V1
- How to Seamlessly Integrate Shopify with Salesforce
- Create OCR App using Salesforce Einstein OCR API
Common Issues
- Object Access issue – Provide access to objects that are used in apex rest implementation
- Apex class access Issue – Apex class should be added to site profile
For another issue, try to create a debug log for the site user and find out the issue. You can also check Apex REST API using POSTMAN.
Need Help?
Need some kind of help in implementing this feature, connect on linked-in profile.
9 Comments
Pingback: Quick Text in Salesforce - SalesforceCodex
Pingback: Can Chat GPT Replace Salesforce Developer? - SalesforceCodex
Pingback: Apex Enhancement in Salesforce Winter ’23 - SalesforceCodex
Pingback: Difference between WebHook and API Polling - Salesforce Codex
Pingback: Post Chatter Feed Using FeedItem in Flow - SalesforceCodex
Pingback: What is Salesforce Genie? - Salesforce Codex
I am using a developer account. what url should I use in the webhook?
Hello Ramnath,
This is already covered in post. You have to create public API and assign public API url in Shopify Webhook. Please check and if you still have issue, ping me on linked in.
Thank You,
Dhanik
Pingback: Integrate Shopify with Salesforce | SalesforceCodex