
Lightning community is being used to create awesome portal. We can showcase company’s products on community portal. To showcasing our product, zooming is one of good feature. Let us see how can we create zoom-able image lightning component.
Steps to create Zoom-able lightning component.
- Add external fie as static resource
- Create Lightning component
- Use created lightning component
Let us explore these steps in detail
- Add external JS fie as static resource
Download required external files from github account and upload them as static resource. 2. Creating Lightning Component
Create lightning component to make product’s image zoomable.
Zoomable.cmp
-
-
<aura:component>
    <ltng:require
                  styles="{!join(',',
                          $Resource.zoomple + '/styles.css',
                          $Resource.zoomple + '/zoomple.css')}"
                  scripts="{!join(',',
                           $Resource.zoomple + '/jquery-3.3.1.min.js', $Resource.zoomple + '/jquery-migrate-1.4.1.min.js',
                           $Resource.zoomple + '/zoomple.js')}"
                  afterScriptsLoaded="{!c.scriptsLoaded}" />
    <div id="wrapper">

        <div class="section section5">
            <h2>Sniper zoom (with cross) </h2>
            <div class="section">
                <h2>Default settings</h2>
                <a href="{!$Resource.zoomple + '/DSC_8488.jpg'}" class="zoomple"><img src="{!$Resource.zoomple + '/DSC_8488.jpg'}" alt="" style="height:100px;width;100px" /> </a>
            </div>

            <a href="{!$Resource.zoomple + '/DSC_8488.jpg'}" class="zoomplecross"><img src="{!$Resource.zoomple + '/DSC_8488.jpg'}" style="height:100px;width;100px" /></a>
        </div>
    </div>
</aura:component>
Zoomable.js
-
({
    scriptsLoaded : function(component, event, helper) {
        var resourceUrl=window.location.protocol +'//'+ window.location.host + $A.get('$Resource.zoomple');
        var blank = resourceUrl + '/blank.gif';
        var loader = resourceUrl + '/loader.gif';
        var cursor = resourceUrl + '/cursor.png';
        $(document).ready(function() {
            var url={
                bgColor : '#90D5D9',
                offset : {x:-150,y:-150},
                zoomWidth : 300,
                zoomHeight : 300,
                roundedCorners : true
            };
            url.blankURL=blank;
            url.loaderURL=loader;
            url.cursorURL=cursor;
            $('.zoomple').zoomple(url);

            var url1={
                bgColor : '#90D5D9',
                offset : {x:-10,y:-10},
                zoomWidth : 300,
                zoomHeight : 300,
                roundedCorners : true
            };
            url1.blankURL=blank;
            url1.loaderURL=loader;
            url1.cursorURL=cursor;
            $('.zoomplecross').zoomple(url1);
        });
    }
})
-
- Use created lightning component
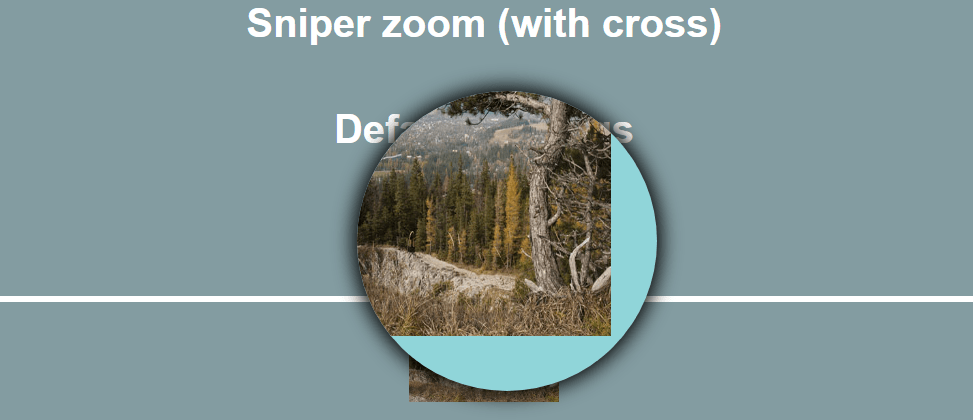
Add created lightning component on any portal page to see outcome. Below screenshot is showing how portion of image will be shown as a zoomed image.
<c:ZoomComponent/>
4 Comments
Thank you for your note,Very helpful post to me
Thank you, Ankita.
The output is also great
Thank you, Ankita.