Send Email Using Email Template and Apex
Sending Email is one of some important task in salesforce application like sending any report, send task information etc. We have below options to send email in salesforce.
- Use Email Template and SingleEmailMessage class
- Create VF Page and Send it using Apex
Let us see first approach in this post. For sending email with attachment below steps are required
- Create Email Template
- Send Email using Apex
- Create Lightning Action component
- Create Lightning Action on Object
- Add button on Page layout
We can send any report as attachment also. Let us see step by step information to send email using Email Template.
- Create Email Template
Email templates can be used to increase productivity and ensure consistent messaging. Email templates with merge fields let us quickly send emails that include field data from Salesforce records. We have used account record to create template.
Open email template page by navigating Setup->Classic Email Template->New Template->Visual Force
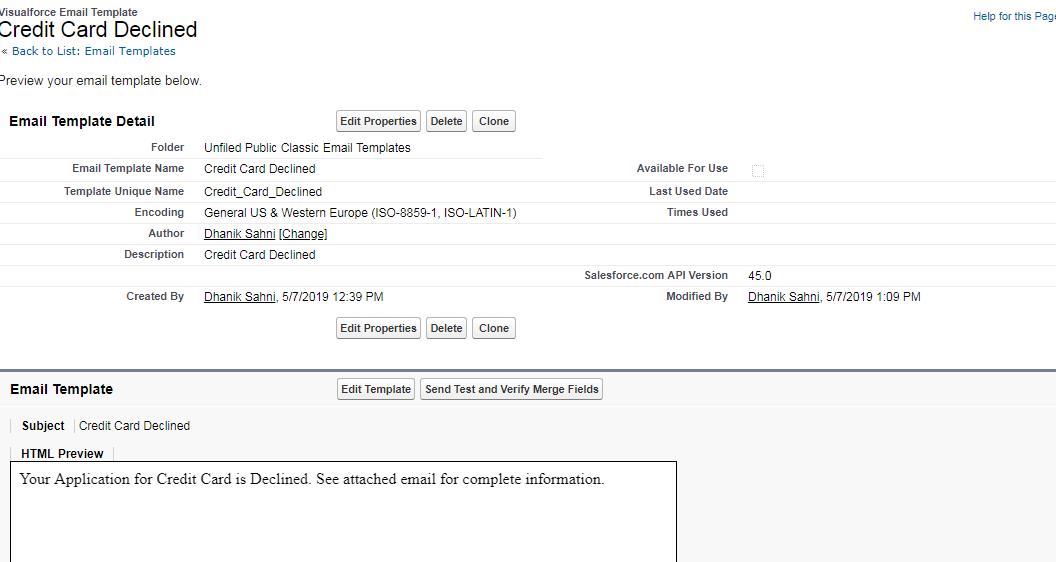
Provide email template information
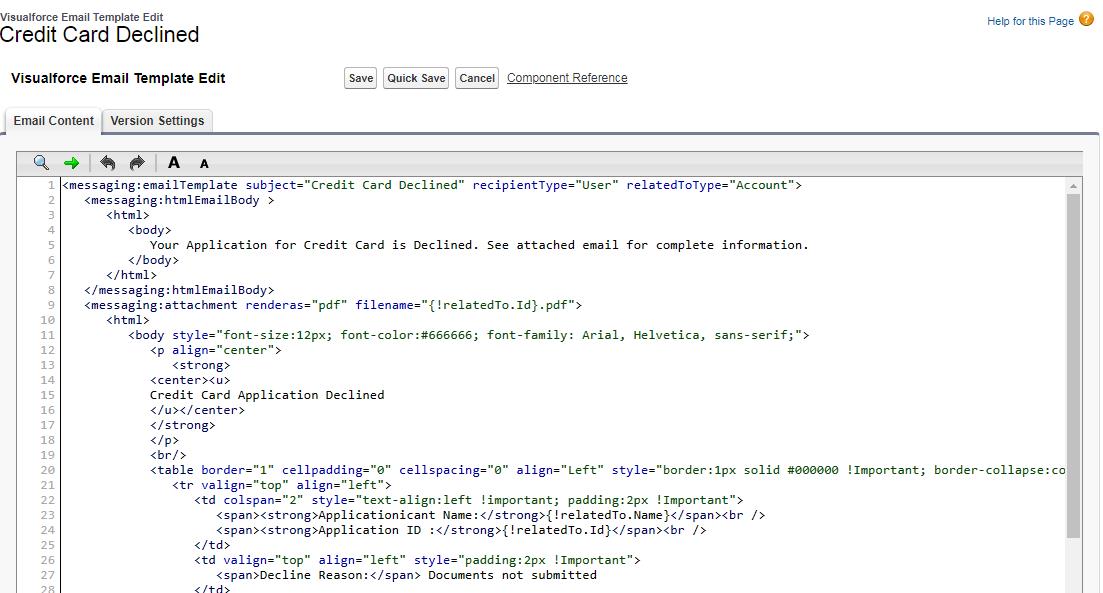
Edit Template to create decline letter. This letter will be sent as email so Different HTML body and Email attachment will be provided.
Create email body based on your requirement. After saving email body it will show HTML preview.
2. Send Email using Apex
Let us create an Apex method which will send email based on current record and above template id. Messaging.SingleEmailMessage is used to send single email message to respective user.
@AuraEnabled
public class CreditCardController {
        public void sendEmail(string acctid)
        {
            Messaging.SingleEmailMessage mail = new Messaging.SingleEmailMessage();
            mail.setTargetObjectId(UserInfo.getUserId());
            //Change with Template ID
            mail.setTemplateId('00X7F000000EiTl');

            //Record ID for which letter will be generated
            mail.setWhatId(acctid);
            mail.setBccSender(false);
            mail.setUseSignature(false);
            mail.setSenderDisplayName('Card Division');
            mail.setSaveAsActivity(false);
            Messaging.sendEmail(new Messaging.SingleEmailMessage[] { mail });
        }
}
3. Create Lightning Action component
Button can be added to classic page layout and Lightning layout to send email. Let us create a lightning component which will work as quick action button. We will add this on our layout.
<aura:component controller="CreditCardController"
                implements="flexipage:availableForRecordHome,force:hasRecordId,force:lightningQuickActionWithoutHeader" >
    <aura:attribute name="recordId" type="Id" />
    <aura:handler name="init" value="{!this}" action="{!c.apexExecute}"/>
</aura:component>
({
        apexExecute : function(component, event, helper) {
            //Call Your Apex Controller Method.
            var action = component.get("c.sendEmail");
            action.setParams({
                'acctid': ''+component.get('v.recordId')+''
            });

            action.setCallback(this, function(response) {
                var state = response.getState();
                    if (state === "SUCCESS") {
                        //after code
                        response.getReturnValue();

                        $A.get("e.force:closeQuickAction").fire();
                    }
            });

            $A.enqueueAction(action);
	}
})
4. Create Lightning Action on Object
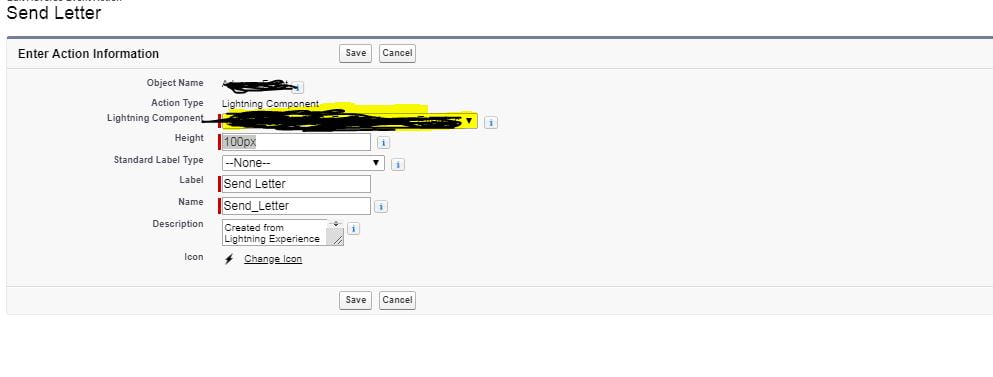
Create one Lightning action button on account page. Select lightning component which we have created above.


7 Comments
Thats a nice tip. But i wanted to know, will this also work for custom objects?
Yes Muni. It will work for custom object also.
Thank You,
Dhanik
Pingback: Apex Send Email » LoginCast.Com
Sir its not working for my custom object please help for me.
Hello Gaurav,
What is not working. Please put complete detail, what error you are getting.
Thank You,
Dhanik
Pingback: Schedule Email alerts based on Business Hours in Salesforce
Pingback: Apex Send Email • 3Z Acdemy