
Salesforce Spring ’25 introduced a major improvement in Flow. These updates make it easier for admins and developers to boost productivity and enhance the end-user experience. This post will explore the key Flow features from the Spring ’25 release.
1. Create Responsive Screens with Automatically Triggered Screen Actions (Beta)
We can now set up flows to run automatically in the background whenever the values connected to screen actions change. Before, clicking a button was the only way to start a screen action. Now, the results can be shown right on the same screen, allowing users to see the outcomes of their actions without needing to click anything.
This screen is built to get contact based on the selected account. We can create an auto-launch flow to get contacts based on the selected account from the lookup.
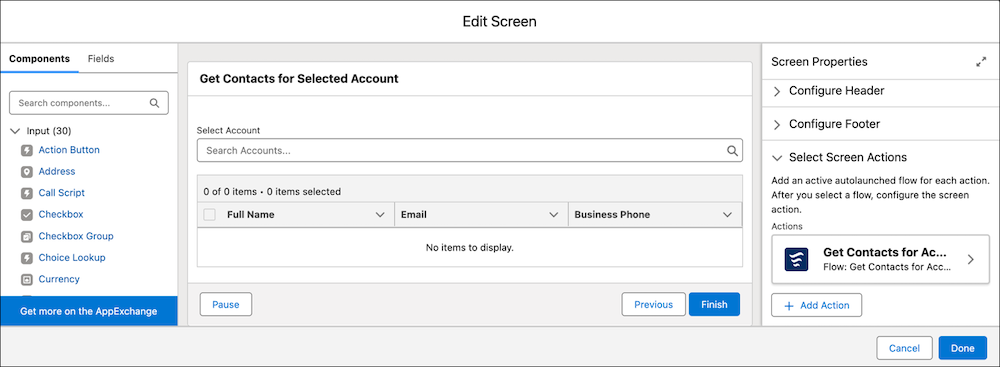
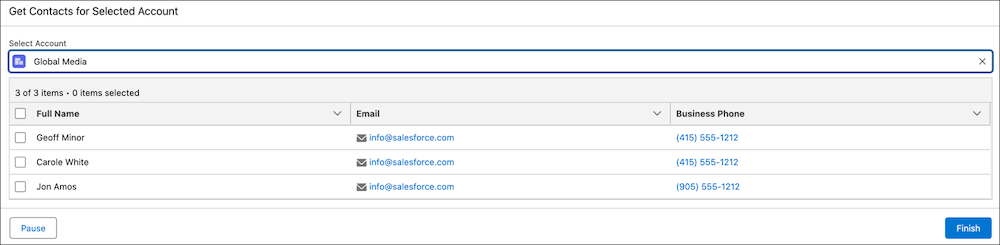
When a user selects an account, they will instantly see all the contacts related to that account on the same screen—there’s no need to click any buttons.
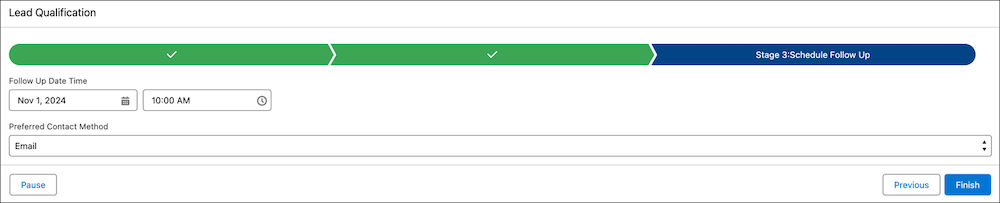
2. Visual Progress Indicators for Guided Screen
We can now build a guided screen in screen flows using a built-in progress indicator. There is no need to write custom code for the wizard kind of screen.
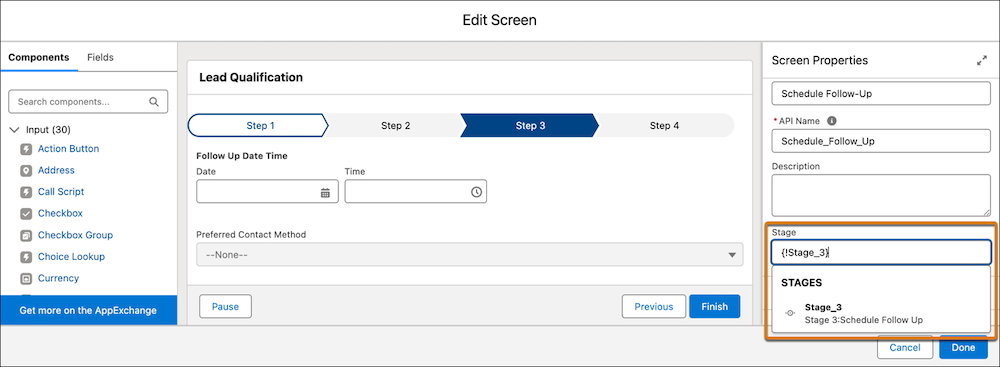
Users can see which step they are on and how many steps are left. We can choose to place the progress indicator at the top or bottom of the screen, and we can select either a simple or a path-style indicator.
The developer/Admin can setup the current stage using the Stage property.
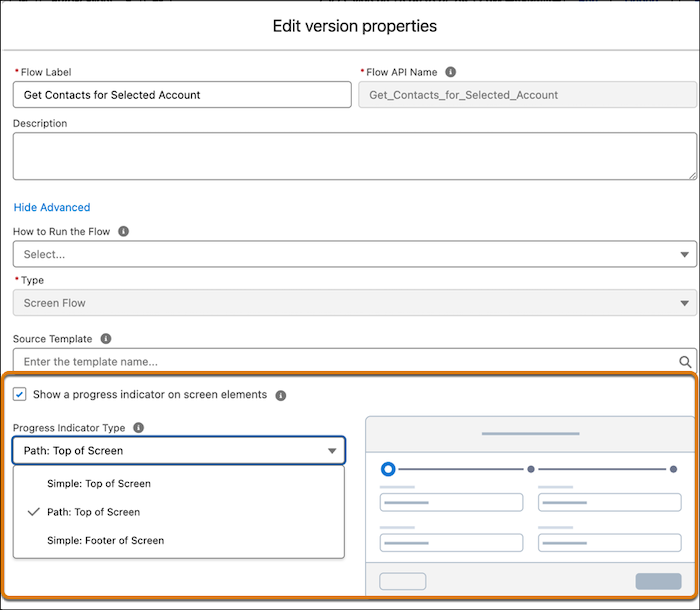
We can set up the progress indicator type using the flow version property page. **Note that the path-style indicator can only be shown at the top of the screen.
It will show users like the below to handle wizard kind of screen.
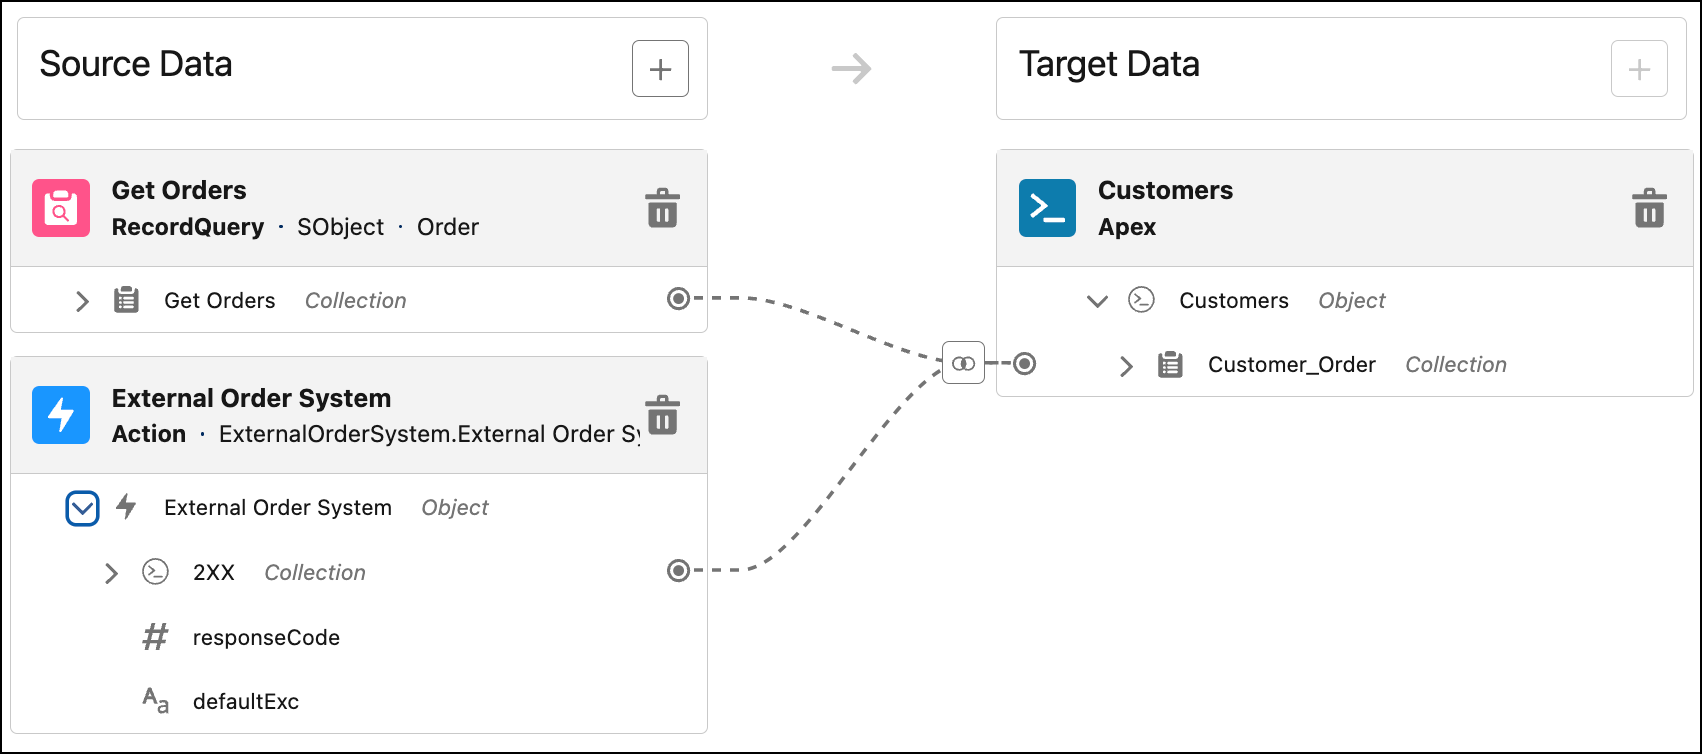
3. Join Collections of Related Flows with the Transform Element
We can now combine multiple datasets from dissimilar sources into one set. For instance, we can organize order records from an external system with orders from Salesforce into a single array. This gives a common structure to the data which can be represented in a data table at a flow screen. The flow screen will present each order and the amount and quantity of each order all on the same page so information is not dispersed.
The below image shows, that we can add a target collection that stores the combined data from salesforce and external systems.
4. Send Emails with Attachments in Flow Builder
We can now send emails with attachments using Salesforce flow. It allows us to send or share documents to recipients using the Send Email action. We need to put the file ID in the Attachment ID attribute of Send Email Action.
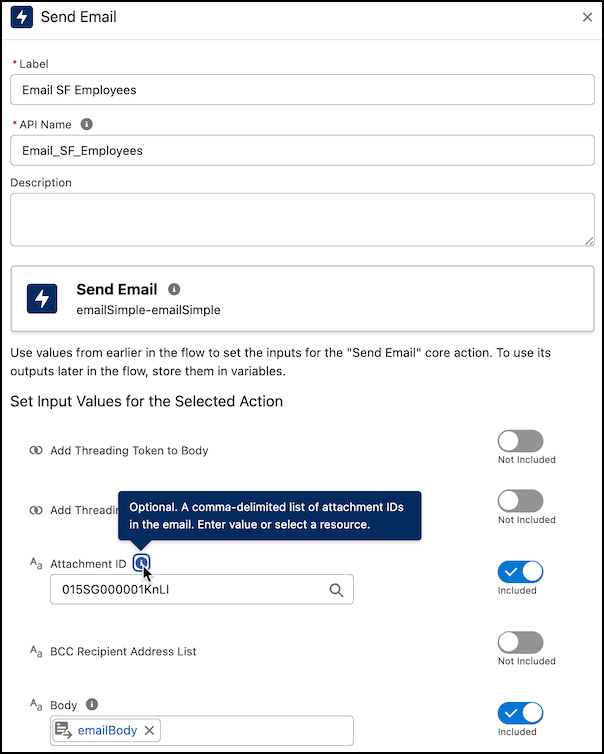
Note: The maximum size of the email created, including attachments is 35MB.
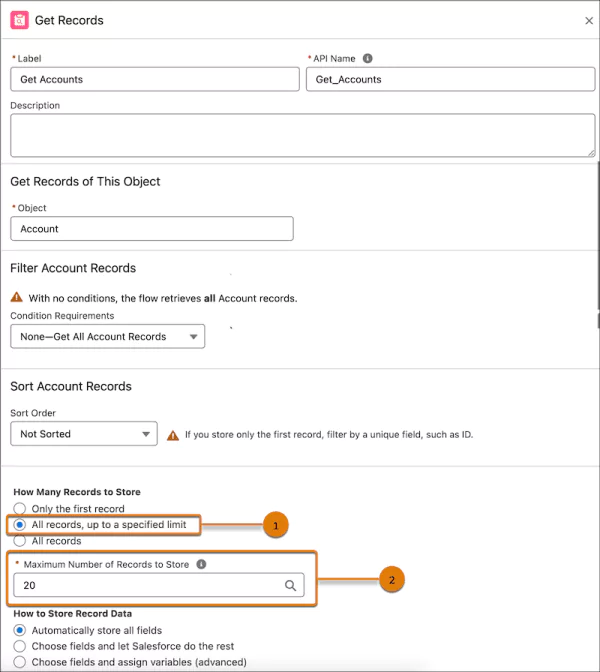
5. Boost Flow Performance by Limiting the Number of Records Retrieved with Get Records
When we work with large datasets, there might be performance problems or governor limits when using the Get Records element. To handle this performance issue we can now set an upper limit for data retrieval. It will also reduce the possibility of timeouts or errors.
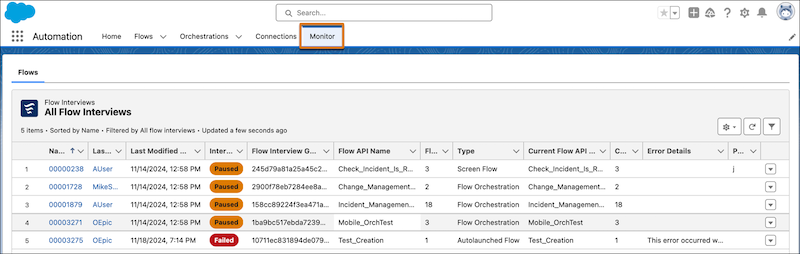
6. Track All Failed and Paused Flow Interviews Using the Automation Lightning App
The new Monitor tab in the Automation Lightning app will display all failed and paused flow interviews. This tab gives important details about why a flow interview failed. We can troubleshoot failed interviews and restart paused ones directly within the app.
By keeping all this information in one location, we can maintain smooth business operations and boost overall efficiency and productivity.
7. Have Unlimited Paused and Waiting Flows
The limit for paused and waiting flow interviews in Salesforce Org is removed now. This limit was creating issues while debugging flow. The number of paused and waiting flow interviews is now limited based on the organization’s available storage. If we need more storage then we have to reach out to our Salesforce account representative.
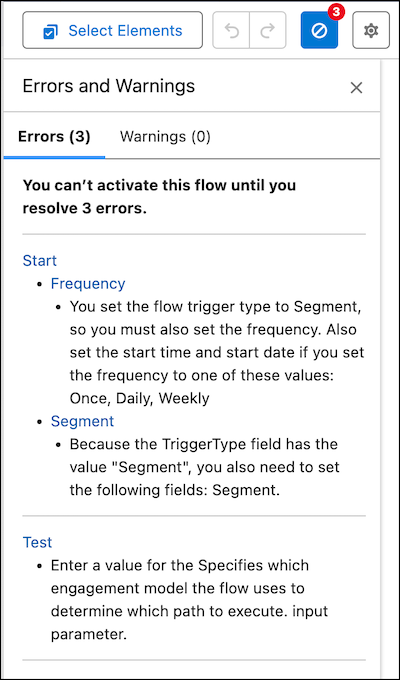
8. Resolve Flow Configuration Issues with Enhancements to the Errors and Warnings Panel
We can now hide warnings that we don’t want to see again in the Errors and Warnings pane. The pane also features more helpful messages for all elements like the links that take us directly to the source of the error on the Flow Builder canvas. Errors are organized by element, allowing us to tackle them more efficiently.
9. Receive Instant Feedback on Screen Components with Invalid Values
We can now validate user inputs as soon as the user moves to another screen component. For example. Let us example, we have a user creation screen with screen component name, email, phone, and address. When a user enters an email address, the component checks if the email has the correct domain as soon as they click on another screen component. It will enhance user adoption and accuracy of data.
10. Access Flow Versions in Flow Builder
We can easily manage different versions of a flow and check the status of each version in Flow Builder. To view the versions of a flow, simply click on the flow’s name in the navigation header of Flow Builder. If you want to open a different version, just click on it, and it will open in a new browser tab.
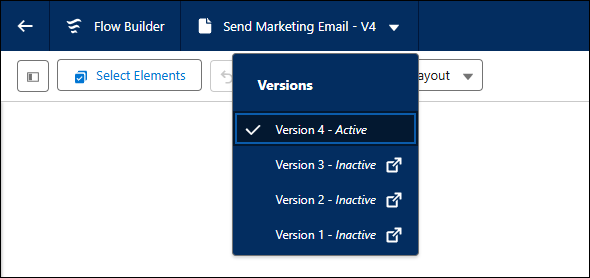
This will improve developer productivity as they can easily navigate to different versions. They can easily compare flow versions to make new changes.
Pre Release
Want to explore more, sign up for a pre-release org