Get ready for a new level of automation and workflow magic with the Salesforce Winter ’25 release! Salesforce Flow – Major updates to help Admins and developers be more productive and get new end-user experience. In this post, we will take a look at the top Flow features from Winter ’25 release that you need to know to get the best out of Salesforce and propel your automation journey.
1. Enable Multiple Choices with Choice Lookup Component
The Salesforce Choice Lookup component is a powerful way to improve the user experience for record selection. This component allowed for multiple record/choice selections for business needs. We can now set up the Choice Lookup component to allow users to choose either one option or multiple options (up to 25). It will make it more adaptable to business needs.
Set choice selection using the component setting.
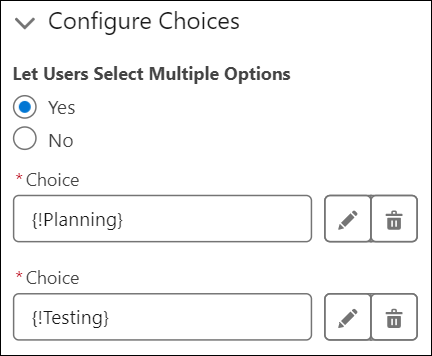
It will appear like below for the user to selection.

2. Disable More Screen Component Fields at Run Time
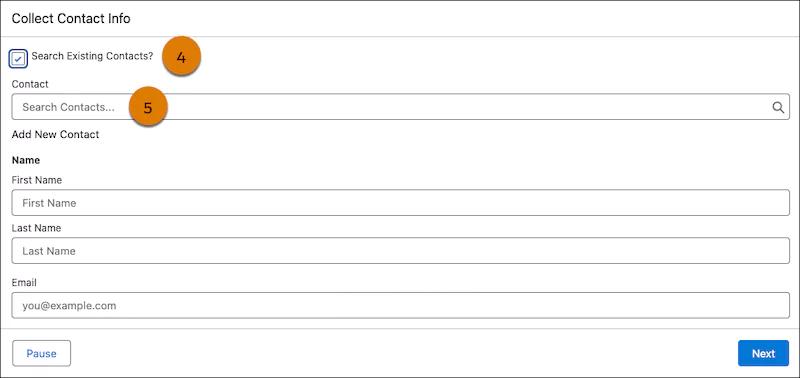
Using the component’s Disabled attribute, we can disable components like Dependent Picklist, Lookup, Phone, and Slider screen. At runtime, these will be grayed out on the screen. They will not get focus, and we can not change their value. These components can be enabled based on other values at runtime.
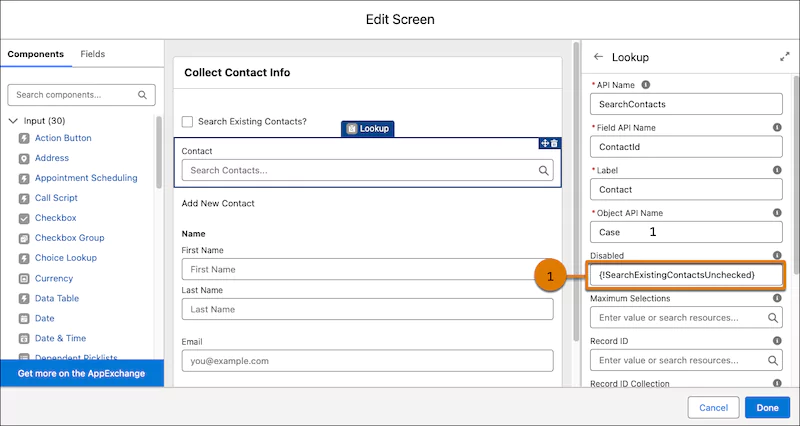
In the above image, the Contact search screen will be disabled based on the flag ‘Search Existing Contacts?’.
Contact search is disabled as the Search Existing Contacts flag is unchecked in below images.
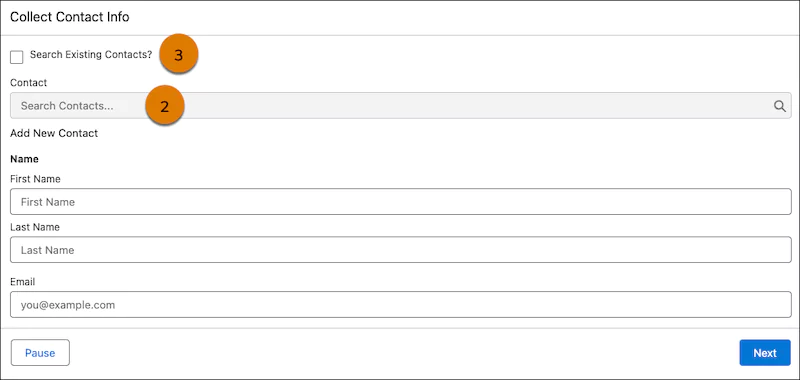
As flag is enabled, Contact Search component is enabled for searching.
3. Troubleshoot Configuration Issues Systematically with the Errors and Warning Pane
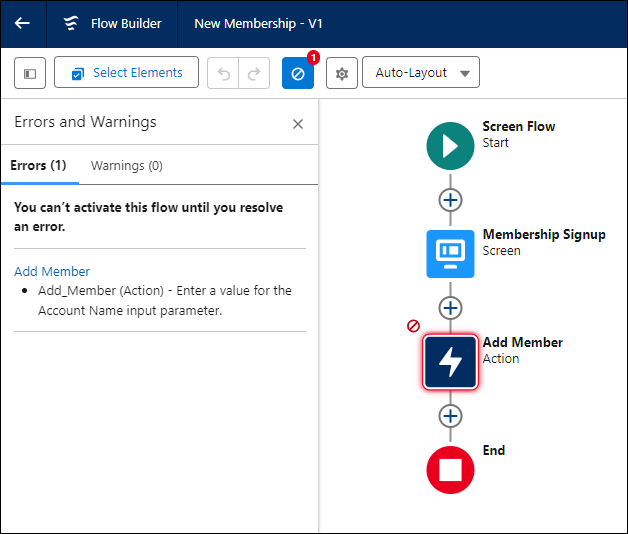
Troubleshooting flow errors is now simpler than ever. The new Errors and Warnings pane displays problems that stop us from saving and activating our flow in an easy-to-read format.
This page also includes links that take us directly to the Flow Builder canvas, helping us pinpoint the source of the issues. We can easily show or hide this new pane using the Show Error button, which has a notification badge that shows the total number of issues we need to address.
4. Find Flow Child Resources More Easily
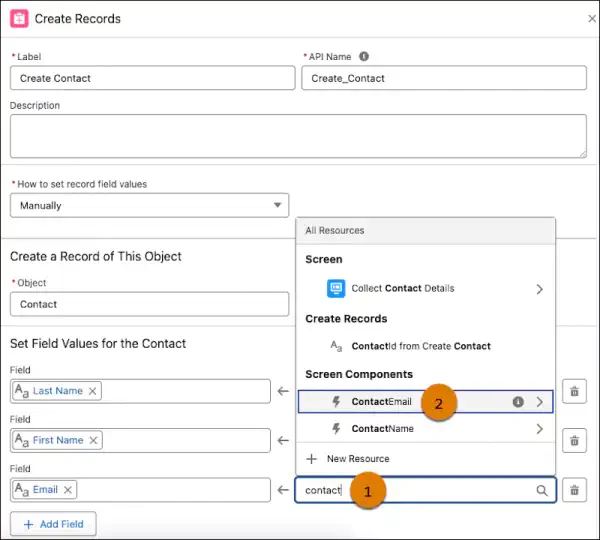
When we want to reference a child resource in a flow, like a screen component within a Screen element, we can now easily search for and select it directly from the updated resource menu.
Before this release, we had to first choose the parent element and then select the child resource separately. This update applies to various child resources, including Screen components, screen actions, Decision element outcomes, and Wait element configurations.
5. Create New Variable and Constant Flow Resources More Easily
It’s now simpler to create new variable and constant flow resources thanks to better organization and clearer labels. Resource grouping is now available for Text, Number, Currency, Boolean, Date, and Date/Time types.
To create a new variable or constant in Flow Builder, open an existing flow or start a new one, then click on “New Resource” in the Manager panel. Choose the type of resource you want, either Variable or Constant, and select the data type.

Click in the Default Value field to enter a value or search for existing resources. You can use the clickable breadcrumb path to see your current location and navigate through resource groups. Additionally, it’s easier to identify resource types now with more intuitive icons.
6. Identify Inefficient Flow Designs with New Tips
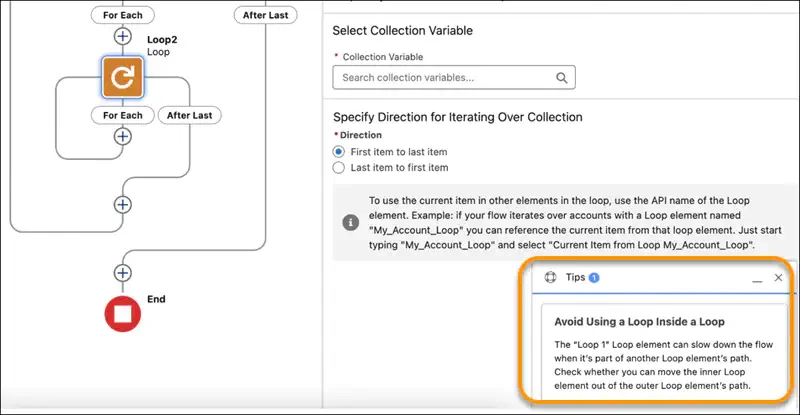
Developer/Admin always face slow performance issue of flow. It is very difficult to debug and find issue in flow. New tips in Flow Builder help us spot designs that could slow down our flows and increase the chances of hitting Apex governor limits.
These tips show up on the Flow Builder canvas and offer advice on how to enhance our flow. By following these suggestions, we can make sure your flows run smoothly and avoid potential performance problems.
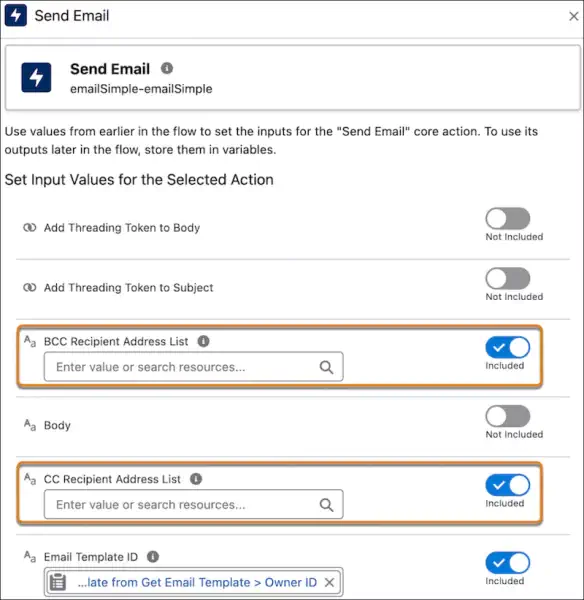
7. Expand Your Email Reach by Using CC and BCC Options in Send Email Action
The maximum number of recipient email addresses has been increased from 5 to 150. We can now include CC and BCC recipients in emails using the Send Email Action in Flow Builder. Anyone added to the CC field will get a copy of the email, while those in the BCC field will also receive a copy, but their email addresses will be hidden from everyone else.
8. Get Records using Action Button At Runtime
With the Action Button component, users can now trigger a screen action by simply clicking a button on a screen. This action runs an active autolaunched flow, and the results can be displayed on the same screen as the button. This feature reduces the number of screens needed, allowing users to complete screen flows faster and with fewer errors.
Previously, users had to click through multiple screens to access the same functionality. The Action Button component is now generally available and includes some improvements since its last release.
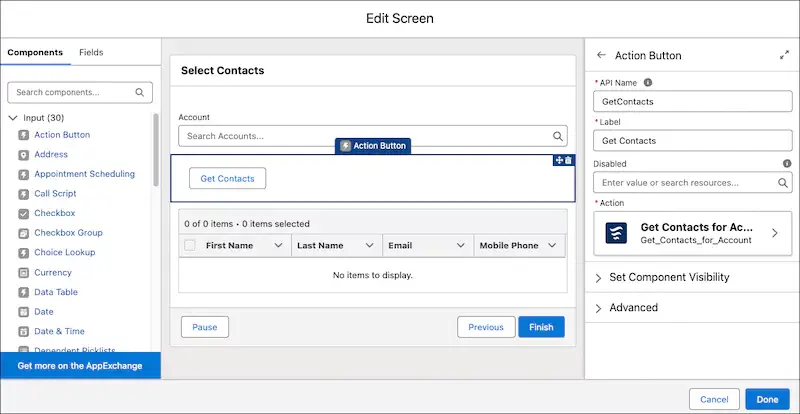
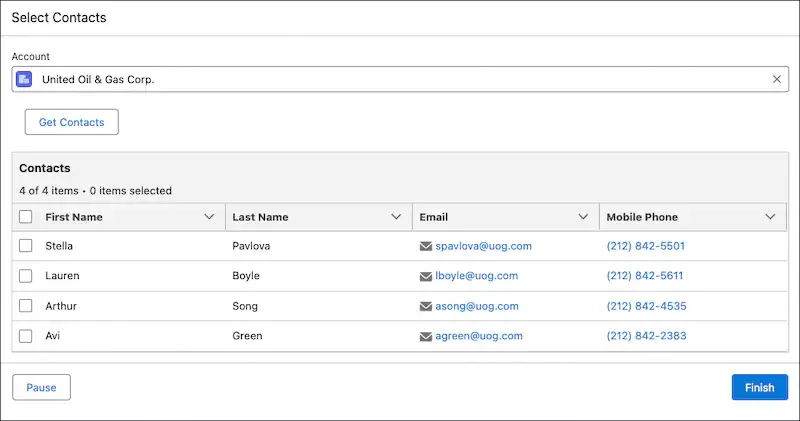
While using, the user has a smoother experience because they can choose the account and the contacts all on one screen, without needing to switch to another screen.
9. Launch Another Active Prompt Flow as a Subflow Within a Prompt Flow
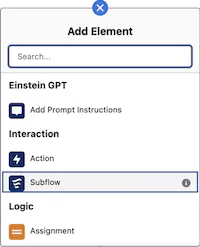
The Subflow element is now available for prompt flows, allowing us to break our automation into smaller, manageable parts and simplify the overall process. We can call another reusable prompt flow from within a prompt flow to perform common tasks. However, prompt flows can only use the Subflow element to reference other prompt flows.
To create a template-triggered prompt flow, start by selecting a prompt template type that will trigger the flow and define the input data type. Then, add the Subflow element to the canvas. Next, search for and choose the prompt flow you want to reference. Finally, use values from the main flow to set the inputs for the referenced prompt flow.
10. Transform Data into More Target Resource Types
With the Transform element, we can now set the target resource to a wider range of data types, including Text, Numbers, Currency, Boolean, Date, and Date/Time. Before this update, the Transform element only supported complex data types like Record or Apex-defined types.
For instance, a sales manager wants to quickly check the total value of all open opportunities to help predict revenue. Using Flow Builder, we can create a flow that gathers these opportunities. The flow then calculates the total value of each opportunity and stores this sum in a number variable, which you can use later in the flow.
The flow runs the Get Records element to collect all open opportunities. Then, the Transform element uses this collection as its Source Data. The Target Data of the Transform element saves the transformed value as a Number data type.


