Salesforce Development in Visual Studio Code
Force.com has discontinued its IDE for further development process. Instead of Force.com IDE, Salesforce Extensions for VS Code is recommended.
Visual Studio Code is a source code editor developed by Microsoft for all major OS like Windows, Linux and macOS. It includes support for debugging, embedded Git control, syntax highlighting, intelligent code completion, snippets, code refactoring and test coverage.
For working in Visual Studio Code for Salesforce development, Four major steps are there
1. Authenticate Visual Studio Code with Salesforce Org
2. Code Retrieval
3. Code Changes
4. Code Deployment.
Before starting, install Visual Studio Code from https://code.visualstudio.com/
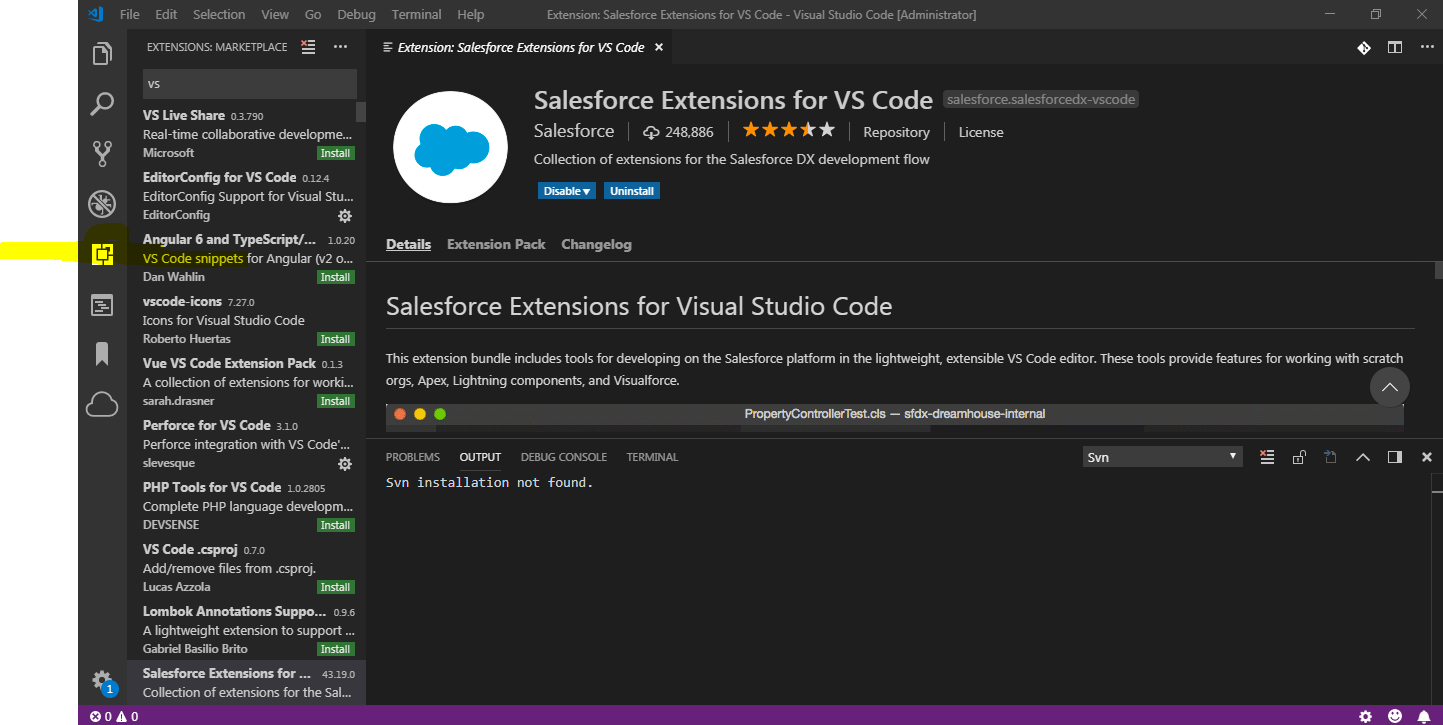
Once Visual Studio Code is installed, install extensions Salesforce Extensions for VS Code and ForceCode by clicking highlighted icon.
Let us now start each step one by one.
1. Authenticate Visual Studio Code with Salesforce Org:
We have to authorize Visual studio code to connect and get/save code. You can connect with Dev Org for this exercise.
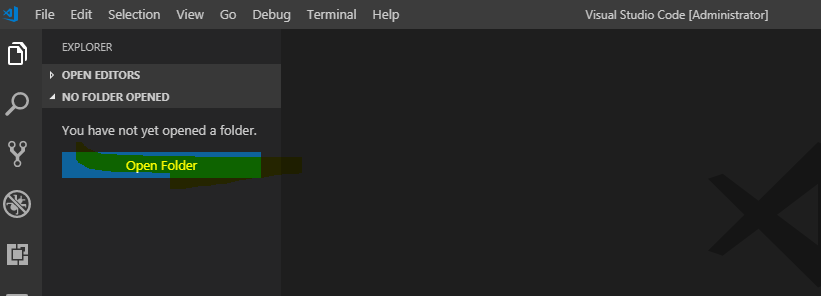
Before connecting with Org, first open folder where code will be retrieved. Click highlighted button to open folder. You can also use File->Open Folder to open folder.
Open command window from View->Command Palette. It will open popup like below screenshot.
In that window, write ForceCode: ForceCode Menu to authenticate using dev org. Select New Org from list to start authentication process.
This will open org selection popup. You can select Sandbox or production org from list. Let us select Sandbox/Test for connecting with dev Org.
This will open org login page. Login into org to step in next process.
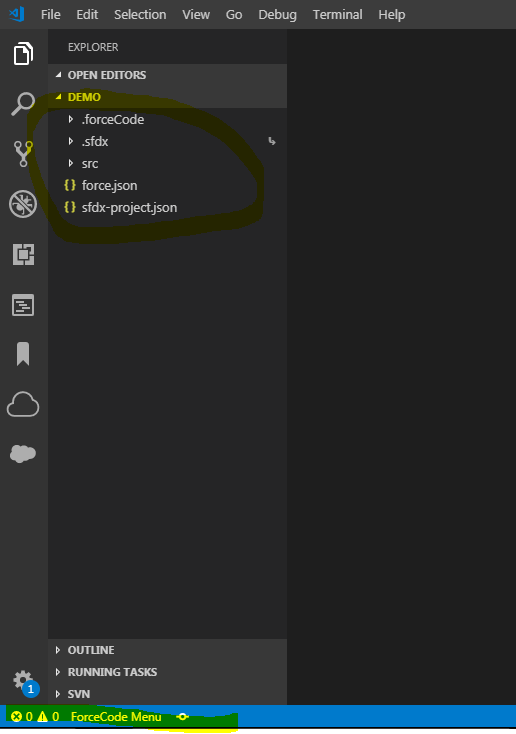
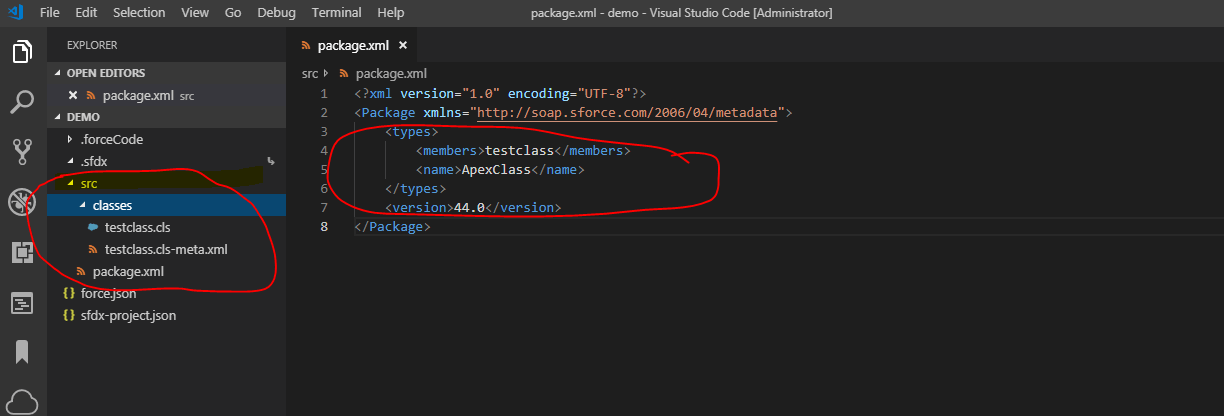
Once authentication is successful, we will get src folder and json files as shown in below image in opened folder. In footer/tray one menu ForceCode Menu is also added.
2. Code Retrieval
Now Visual Studio Code is connected with Dev Org. Let us retrieve code from org. You can retrieve complete code or you can use package.xml to get specific code.
Click ForceCode menu from bottom or View->Command Palette. This will open popup to select connected Org. Select org which you have connected.
Once you selected org. It will open another popup to set behavior to save on server. If you select yes, each time you save code it will deploy code to connected org. So let us select No, we will deploy code once we complete one code block.
Let us get code from below package.xml
<?xml version="1.0" encoding="UTF-8"?>
<Package xmlns="http://soap.sforce.com/2006/04/metadata">
   <types>
        <members>TestClass</members>
        <name>ApexClass</name>
    </types>
    <version>44.0</version>
</Package>
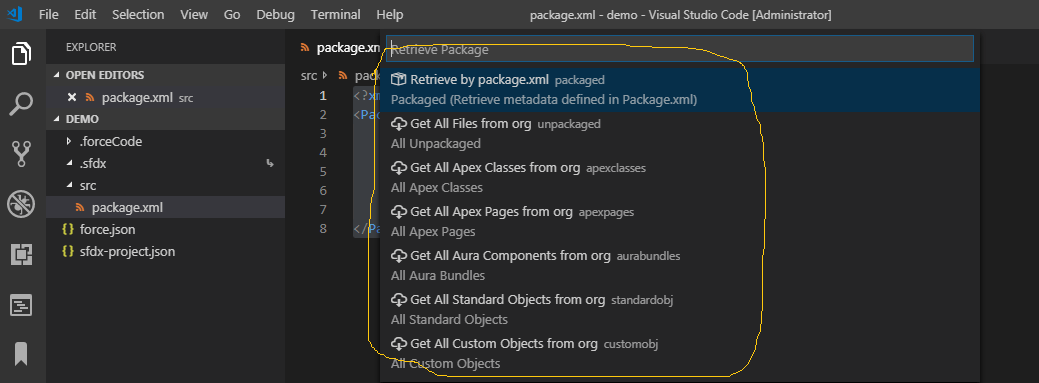
Open command palette once again and select Retrieve package/Metadata to get code.
It will open list of options to get code. Select first option Retrieve by package.xml
It will get code as mentioned in Package.xml.
3. Code Changes
After code is retrieved, do your changes. For example I have added code
* Code Chage from Visual Studio Code*/
4. Code Deploy
Let us deploy this code change to dev org. Open command palette once again and select Deploy package.
On another popup select Deploy from package.xml to deploy code from package.
Once deployement process, it will show status in output window.
Summary:
Visual Studio is very light tool for coding and performance wise also it is very fast. All features of Salesforce can be used here.








6 Comments
Thank You For sharing such a wonderful Article on Visual Studio code IDE with SFDC
Thank You Kishan.
Well explained in step by step. Easy to configure. Thank you for the post.
Thank You Madhu.
JetForcer is a powerful and modern IDE for Salesforce development.
Just try it out at compare with VSCode.
https://jetforcer.com/
very helpful