Named and External Credential are critical tools for secure data connectivity within Salesforce. Named Credentials serve as a pointer to an external endpoint, enabling the platform to securely authenticate and access resources without disclosing sensitive information such as passwords.
External Credentials, conversely, remove the authentication details from the integration code, improving security by separating sensitive data from the codebase. These credentials can be used within Named Credentials to authenticate to external systems, providing a more centralised and secure method for authentication management in integrations.
In this post, we will see how to add authentication parameters in external credentials and access those parameters in Salesforce Apex Code. I have integrated Salesforce to access tokens. You can use this based on your business requirements.
Let us see step-by-step approach to using external credential parameters in code.
- Create a Salesforce Connect App
- Create Named and External Credential
- Create Apex code to use External Credential Parameters
1. Create a Salesforce Connect App
Create a connected app in Salesforce. Follow steps 1-3 from post Generate Salesforce Authentication Token using Postman to create a connected app.
2. Create Named and External Credential
External Credentials are used to store reusable authentication information for external systems. As we need to generate an access token for Salesforce, we need the below parameters,
| client_id | Put the Consumer Key value from the connected app created from the above step. |
| client_secret | Put the Consumer Secret value from the connected app created from the above step. |
| username | Salesforce username that will be used to authenticate |
| password | Salesforce username password + security token for the user. |
| grant_type | password (hardcoded) |
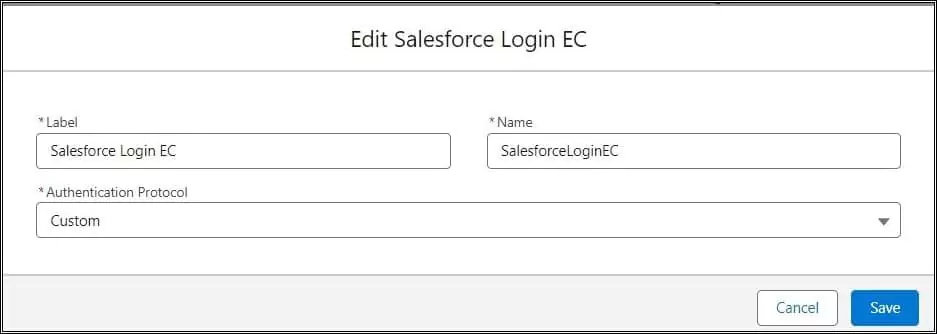
Let us add these parameters to the external credential. Create an external credential Salesforce Login EC that will use a custom authentication protocol.

Create a Named Principal
A named principal applies authentication configuration to the named credential. We can use the same credential or authentication configuration for the entire org or we can use a per-user authentication configuration.
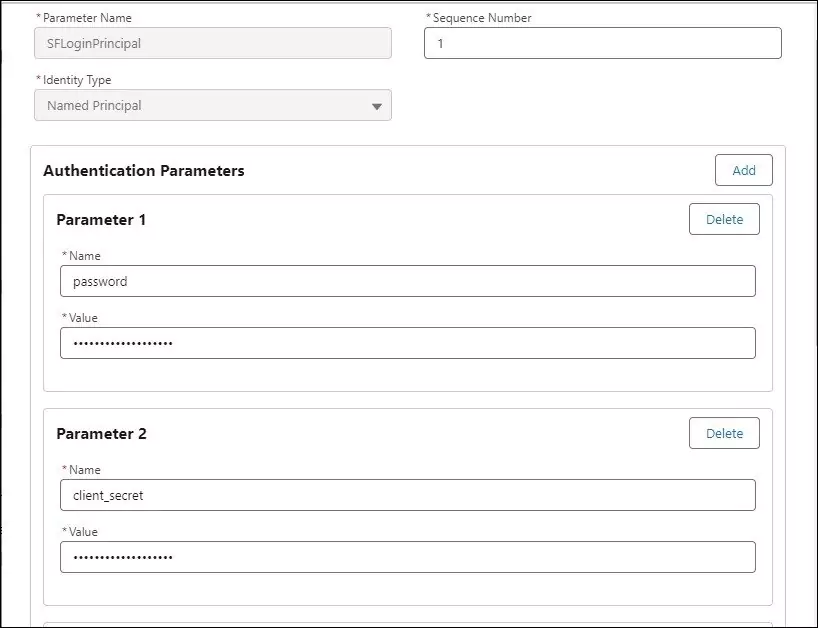
Let us create a named principal with the above-mentioned authentication parameters. Parameters added in the named principal are secure and its values are not visible to the user. Create a named credential SFLoginPrincipal.
Add all four types mentioned above in the named principal. In the below image, password and client_secret parameters are added. Add username and client_id as well.

Create a Named Credential
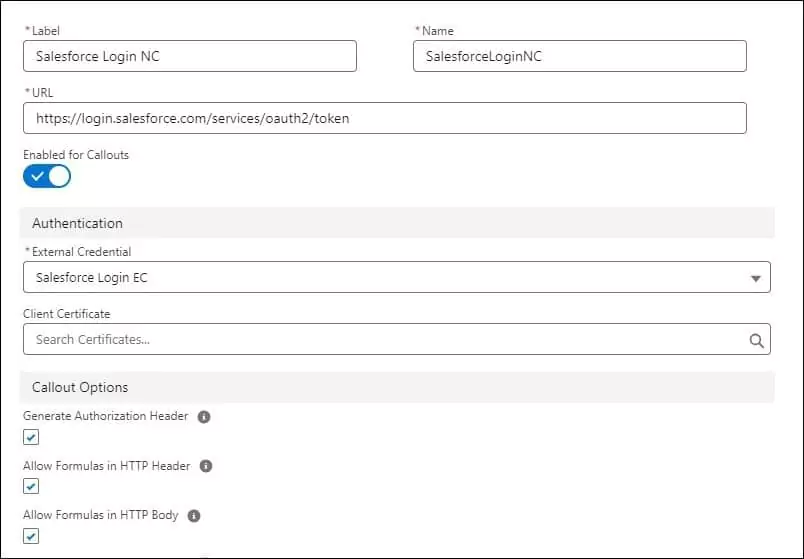
Create a named credential with the name Salesforce Login NC (SalesforceLoginNC) and the below properties.
| URL | https://login.salesforce.com/services/oauth2/token |
| Allow Callout | checked |
| External Credential | Above created External Credential Salesforce Login EC |
| Generate Authorization Header | Checked |
| Allow Formulas in HTTP Header | Checked |
| Allow Formulas in HTTP Body Help | Checked |

Create Permission Set
Create a permission set to provide user access. Create a permission set Salesforce Login PS and assign the above created external credential Salesforce Login EC in External Credential Principal Access. Once a permission set is created, assign this permission set to the required user. For this POC, I have added a permission set to myself.
3. Create Apex code to use External Credential Parameters
We have set up named and external credentials. Let us see how we can use the external credential parameters in Apex. To access external credential parameters, we have to access parameters like below
{!$Credential.<External Credential Name>.<Property Name>}.
//Access client_id parameter
{!$Credential.SalesforceLoginEC.client_id}
Let us use above-created parameters to get the Salesforce Access token using the apex class.
4. Test Functionality
Let us test above created class by executing the command in the Developer Console.
//SalesforceLoginNC is Named credential name
system.debug(JSON.serializePretty(AccessTokenGenerator.generateToken('SalesforceLoginNC')));
It will return token data as below

References
Generate Salesforce Authentication Token using Postman
Create a secure Salesforce API user
Manage Access to a Connected App
Related Posts
Configurable Record Picker in Lightning Web Component
Displaying Tabular Data with GraphQL in Lightning Web Component
Dynamically Instantiate Components in LWC
Seamless YouTube Video API Integration in Salesforce
GraphQL Query Generator in Salesforce Apex
Capture Images in Salesforce using Mobile App
Need Help?
Need some kind of help in implementing this feature, connect on my LinkedIn profile Dhanik Lal Sahni.

