 Between Okta and Salesforce")
In today’s enterprise world, users often need access to multiple business applications across different platforms. These systems should be connected flawlessly. Managing separate credentials for each platform not only reduces productivity but also increases security risks. Single Sign-On (SSO) solves this challenge by allowing users to authenticate once and gain access to multiple applications securely.
Integrating Okta as the Identity Provider (IdP) and Salesforce as the Service Provider (SP) enables seamless authentication, centralized user management, and improved compliance. In this article, we’ll walk through the technical configuration of SSO between Okta and Salesforce using SAML 2.0.
What is Okta?
Okta is a cloud-based Identity and Access Management (IAM) platform designed to secure and manage user access across applications and devices. It provides key features such as Single Sign-On (SSO) and Multi-Factor Authentication (MFA), helping organizations connect users to both cloud and on-premises applications.
Understanding the Core Concepts
- Single Sign-On (SSO): Single sign-on (SSO) is an authentication method that allows users to access multiple applications with a single login and a single set of credentials.
- SAML (Security Assertion Markup Language): SAML is an open, XML-based standard for exchanging authentication and authorization data. This enables single sign-on (SSO) by allowing users to log in once and access multiple applications.
- Identity Provider (IdP): An Identity Provider (IdP) is a trusted service that manages digital identities and authenticates users. It allows users to access multiple applications with a single set of credentials. We have used Okta as the identity provider for this post.
- Service Provider (SP): A service provider (SP) is an application or service that users want to access. It uses an identity provider to authenticate those users and validate their identities. Salesforce is the service provider for this post.
Check out our other post, Configure SAML Single Sign-On between Two Salesforce Orgs, to enable SSO.
Step-by-Step Single Sign-On Configuration
- Enable My Domain in Salesforce
- Configure Okta as an Identity Provider
- Configure Salesforce SML Single Sign-On
- Update Salesforce Login Detail in Okta Configuration
- Update Salesforce SML Single Sign-On Configuration
- Salesforce My Domain Setting Update
- Salesforce Users Update
- Provision Users in Okta
- Demo for Single Sign-On
1. Enable My Domain in Salesforce
By default, we use shared Salesforce login pages (e.g., login.salesforce.com or test.salesforce.com). SAML requires a unique address (Assertion Consumer Service (ACS) URL) where the IdP will send the authentication response. To get a unique address in Salesforce, we need to create My Domain. If My Domain isn’t enabled, there’s no unique endpoint for Salesforce to receive and validate SAML assertions for your org.

Check out the Ultimate Guide to My Domain in Salesforce to enable My Domain in Salesforce.
2. Configure Okta as an Identity Provider
Okta is an identity provider, so we need to configure it before enabling SSO in Salesforce. If you don’t have Okta, then you can register for a free account. It will require a business account.
Once the account is created and verified, go to the Okta admin settings page. Open the applications page from Applications->Applications menu in Okta Admin. Click to Browse App Catalog to open the list of applications for integration.
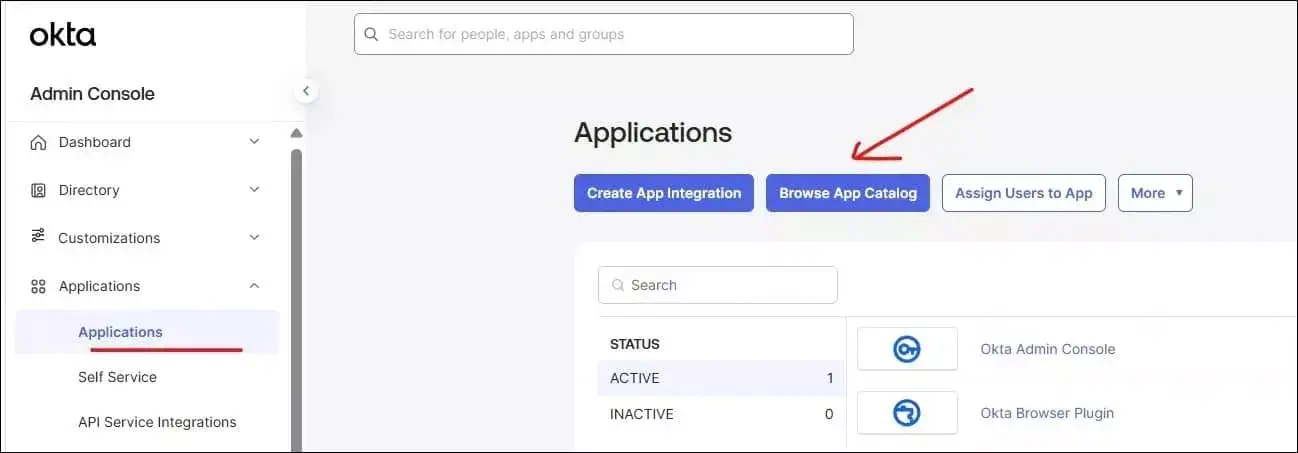
It will open Browse App Integration Catalog page. It will show all connectors available for integration. You can search Salesforce.com from the search screen. It will open the Salesforce.com sign-on integration page.
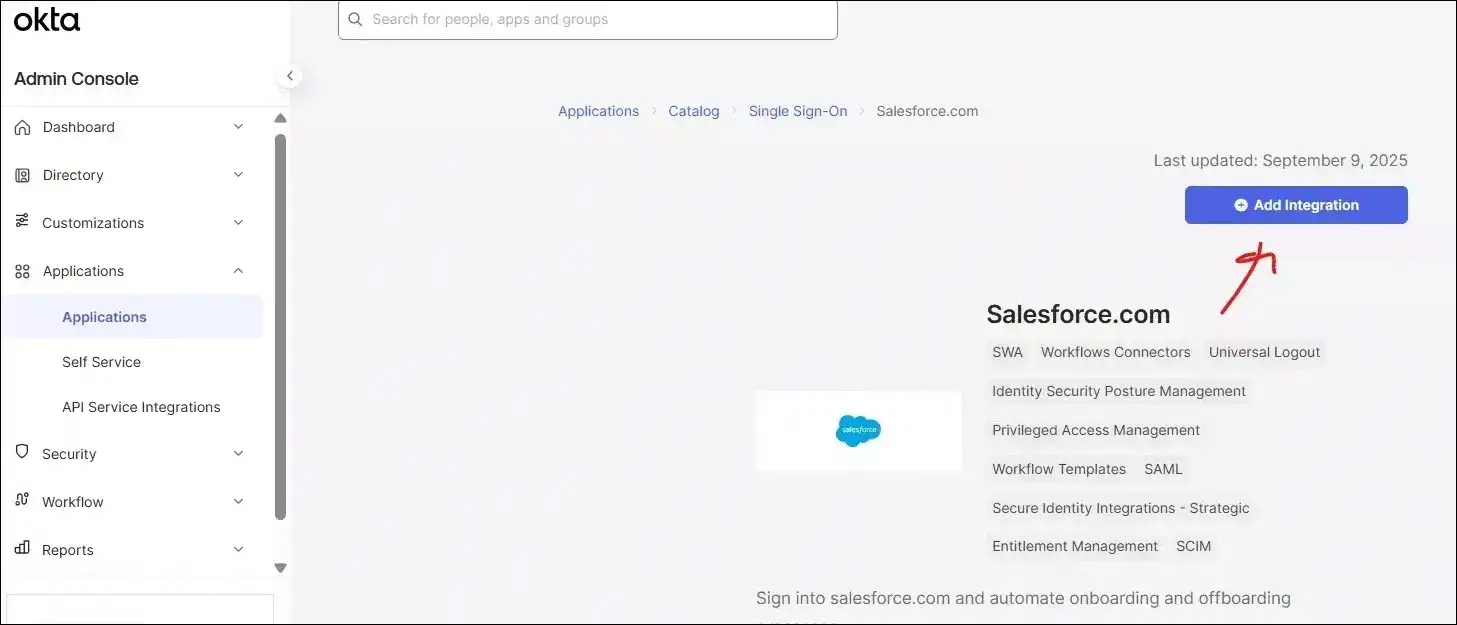
Okta App General Setting:
Click on the Add Integration button to configure Okta-Salesforce Sign-On capability.
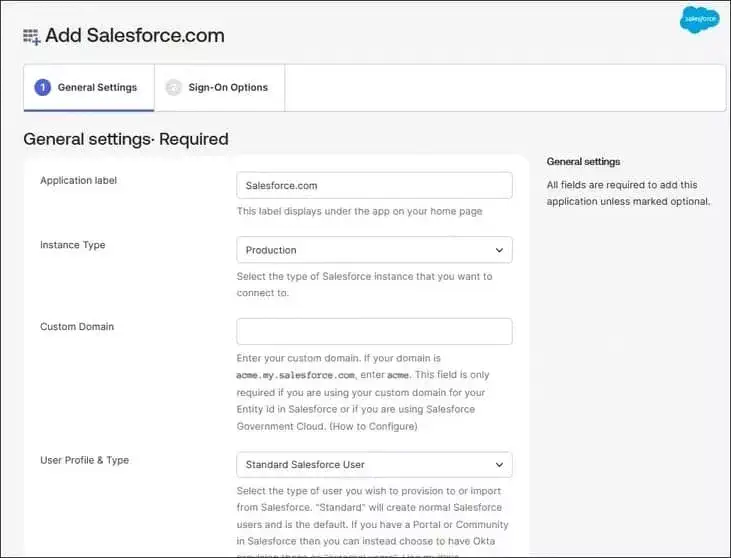
General settings in Okta to configure single sign-on
| Application label | SFDC SSO |
| Instance Type | Production. You can change based on your org. |
| Custom Domain | Put a custom domain name. Leave blank if you are not using a custom domain. |
| User Profile & Type | Standard Salesforce User. You can select this or the other two options (Salesforce Community User or Salesforce Portal user) |
| Seats (optional) | 0 |
| Application Visibility | false |
| Browser plugin auto-submit | true |
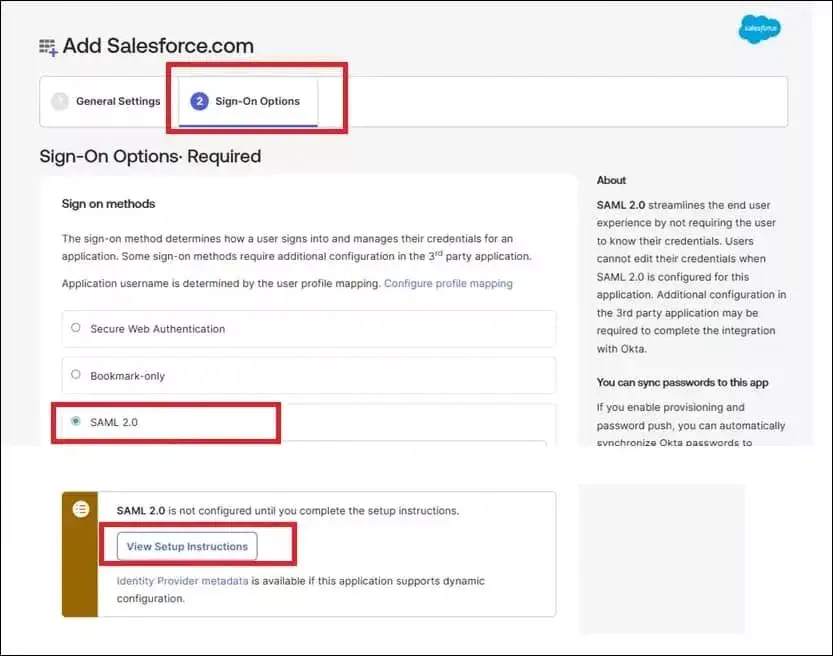
Octa App: Sign-On Options
As we want to enable SAML SSO login in Salesforce, we will select SAML 2.0 as the sign-in method.
After selecting SAML 2.0, click on View Setup Instructions in the highlighted section, as in the images below. Configure Salesforce SML Single Sign-On as mentioned in the document.
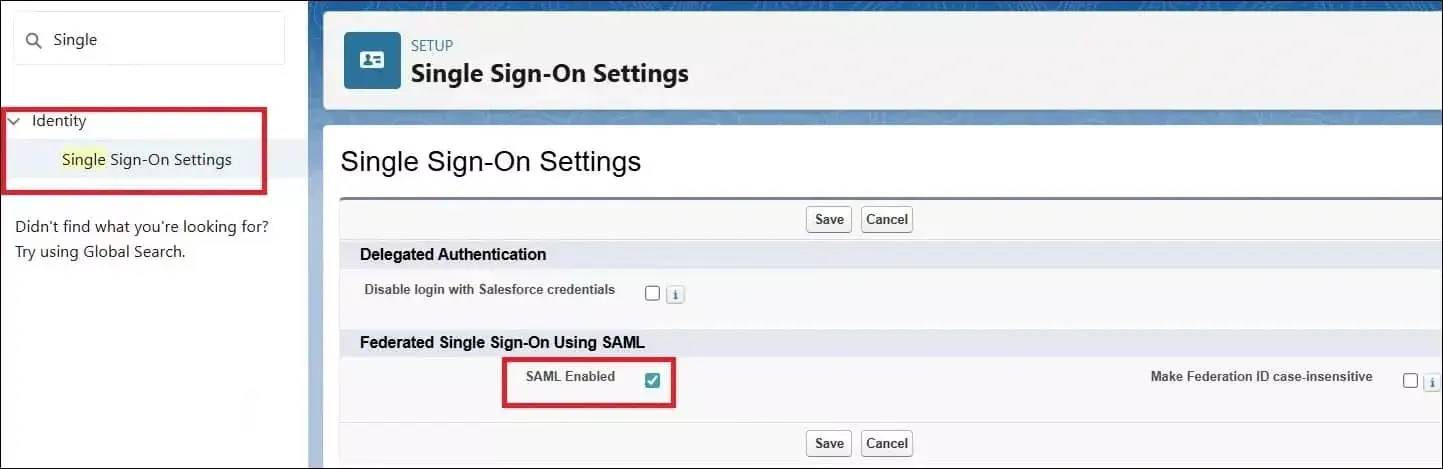
3. Configure Salesforce SML Single Sign-On
We need to enable SAML Single Sign-On in Salesforce. It will help us configure Salesforce as a Service provider.
Use details below for Single Sign-On
| Name | Okta SSO (You can change this name.) |
| Issurer | Take it from the document, something like exw980yfdGKjNwz697 |
| Entity ID | https://saml.salesforce.com. If a custom domain is set, then it will be https://[customdomain].my.salesforce.com |
| SAML Identity Type | Assertion contains the Federation ID from the User object. We will use the User object’s Federation ID for this field value. |
| SAML Identity Location | Identity is in the NameIdentifier element of the Subject statement |
| Identity Provider Certificate | Download from the above-mentioned document |
| Identity Provider Login URL | Get it from the document and set it here. It will be like https://trial-2395062.okta.com/app/salesforce/exw980yfdGKjNwz697/sso/saml |
| Custom Logout URL | Get it from the document and set it here. It will be like https://trial-2395062.okta.com |
Save this setting. After saving, it will provide the login URL, logout URL, and OAuth 2.0 token endpoint. We will use these details in Okta.

Download the Metadata file. We will use this to create a signature certificate.
Create Signature Certificate from metadata file
Open the downloaded metadata file. Copy the ds:X509Certificate value shown below and paste it into a text editor.
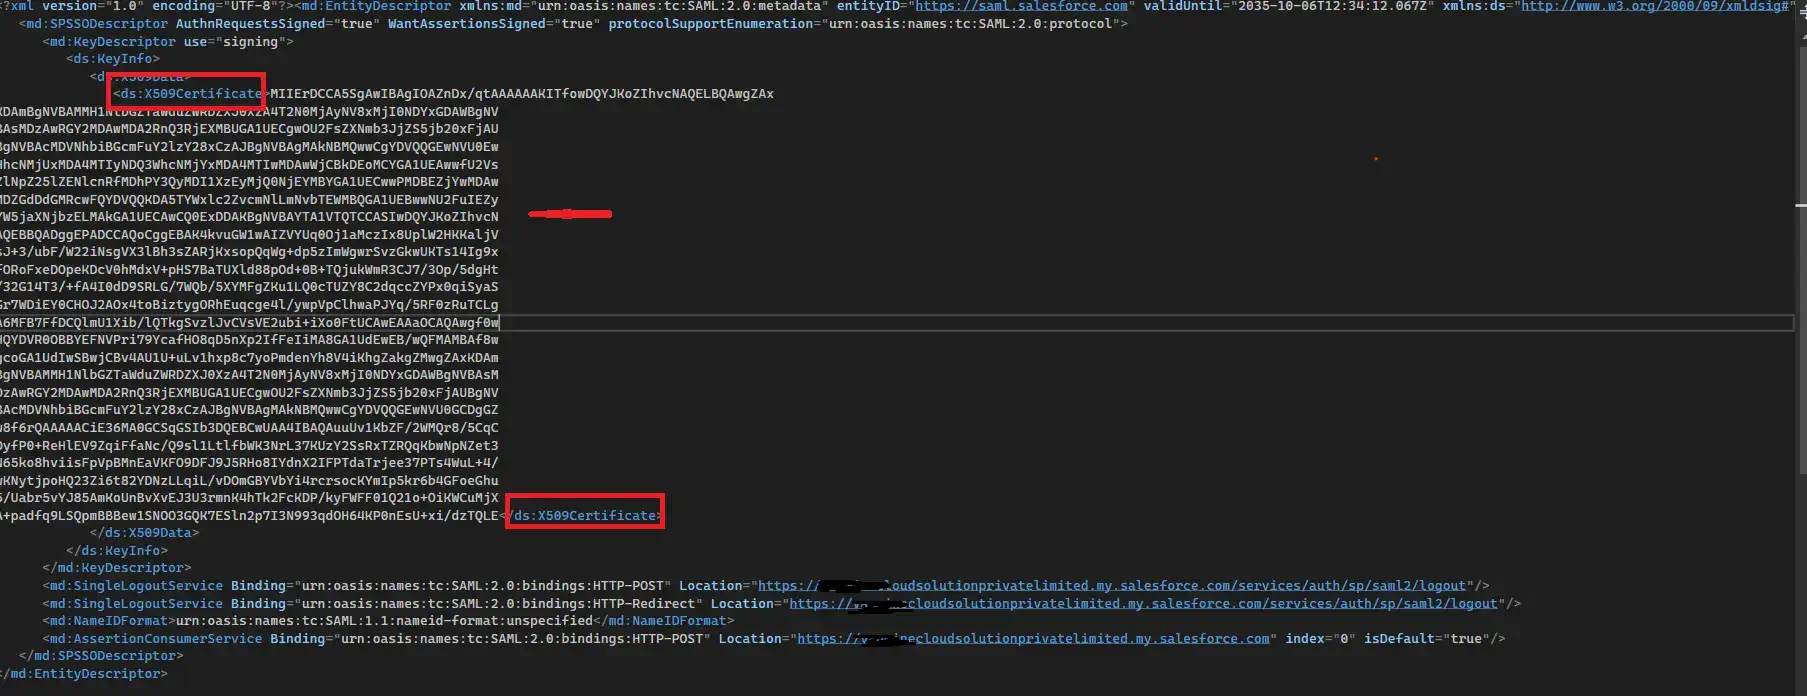
Add the following lines at the beginning and end of the file, respectively:
-----BEGIN CERTIFICATE-----
-----END CERTIFICATE-----
The file will look like below
-----BEGIN CERTIFICATE-----
Xxxxxxxxxxxxxxxxxxxxxxxxxxxxxxxxxxxxxxxxxxxxxxxxxx
Xxxxxxxxxxxxxxxxxxxxxxxxxxxxxxxxxxxxxxxxxxxxxxxxxx
Xxxxxxxxxxxxxxxxxxxxxxxxxxxxxxxxxxxxxxxxxxxxxxxxxx
Xxxxxxxxxxxxxxxxxxxxxxxxxxxxxxxxxxxxxxxxxxxxxxxxxx
Xxxxxxxxxxxxxxxxxxxxxxxxxxxxxxxxxxxxxxxxxxxxxxxxxx
Xxxxxxxxxxxxxxxxxxxxxxxxxxxxxxxxxxxxxxxxxxxxxxxxxx
xxxxxxxxxxxxxxxxxxxxxxxxxxxxxxxxxxxxxxxxxxxxxxxxxx
-----END CERTIFICATE-----
Save this file as slo.crt. We will use it in the Okta SSO setting.
4. Update Salesforce Login Detail in Okta Configuration
We will use the above-generated URLs in Okta. We will set up the login and logout URL in the Advanced Sign-On Settings section on Sign-On page.
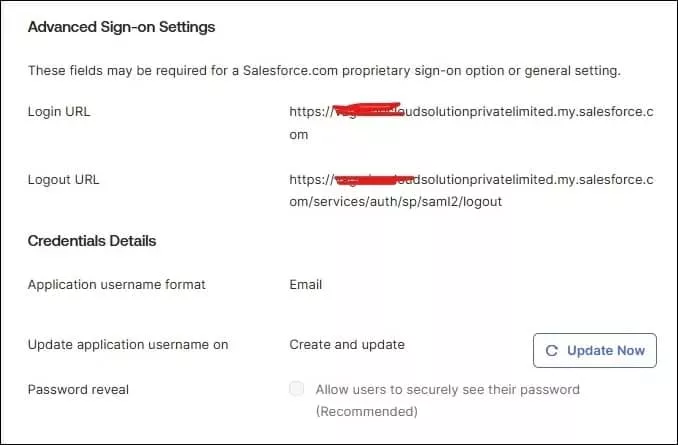
| Login URL | https://{mydomainame}-dev-ed.develop.my.salesforce.com |
| Logout URL | https://{mydomainame}-dev-ed.develop.my.salesforce.com/services/auth/sp/saml2/logout |
Credentials Details
| Application username format | Okta Username |
| Update application username on | Create and Update |
| Password reveal | false |
Save this setting.
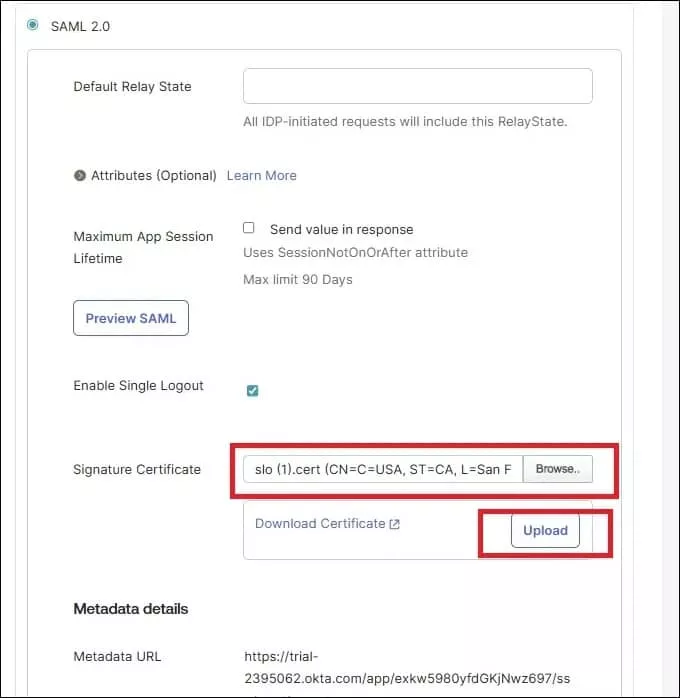
Upload Salesforce Certificate
We need to upload the slo.crt certificate in Okta, which was created in the above step. Select SAML 2.0 in the Sign-On setting page. Check the Enable Single Logout feature to upload the certificate. This will show the file upload section. Upload slo.cert file.
It will show the download certificate after uploading the certificate file. It will also provide metadata URL, Sign on URL, Sign out URL and issuer detail. We will use this detail and update the Single Sign-on setting in Salesforce.
5. Update Salesforce SML Single Sign-On Configuration
We will update the Sign out URL in Salesforce Sign-on settings. Check the Single Logout Enabled checkbox and paste the Identity Provider Single Logout URL (Logout URL from the above step) into the corresponding field.

6. Salesforce My Domain Setting Update
We need to set Okta as the authentication service in My Domain. Edit the Authentication Configuration section on the My Domain page. Select Okta SSO from the authentication service.
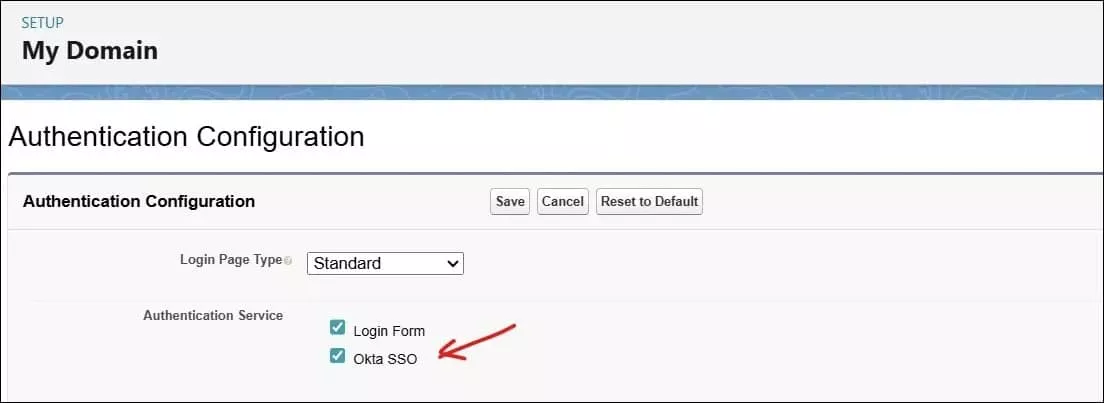
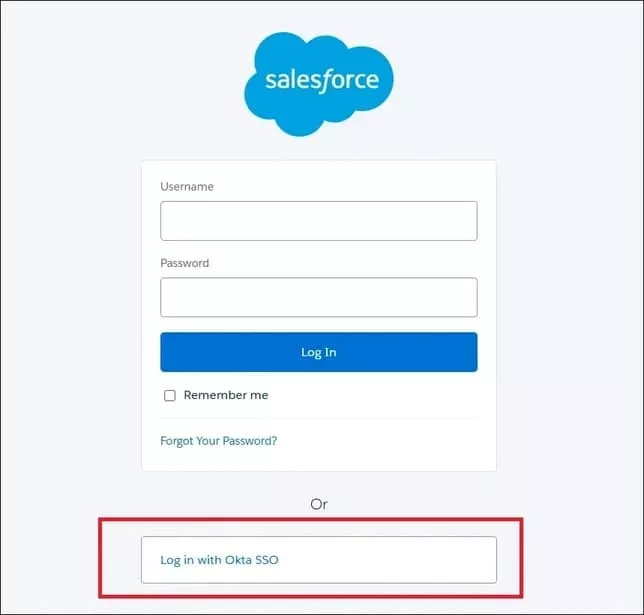
It will add an Oka SSO login section to the Salesforce login page.
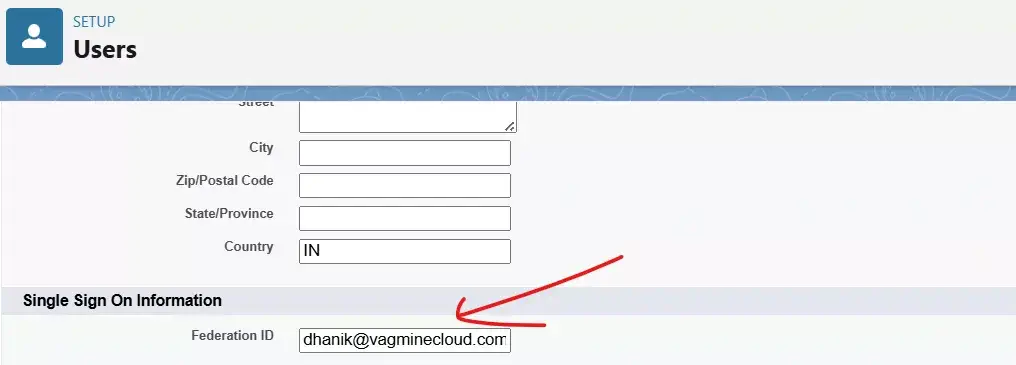
7. Salesforce Users Update
Now we have configured everything in Okta and Salesforce for Single Sign-On functionality. As we have used Federation ID for the SAML Identity type, we have to update the Federation ID field in the user records. This will be done for each user. We will put the Okta username in the Federation ID field. We can think of it as a mapping between two systems.
8. Add Users in Okta
We need to add users to the created application so that it can be mapped to Salesforce users. Open the integration application in Okta and click on the Assignments tab for manual entry of a single user. For multiple user assignments, use the imports tab.
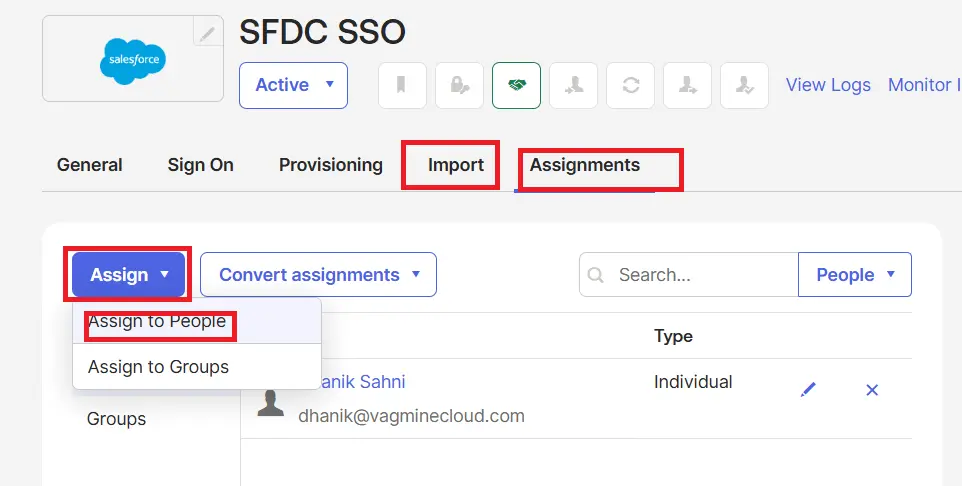
Add the user to this application, as we have added Dhanik to this application.
9. Demo for Single Sign-On Login
Debug SAML Sign-On Errors
If you are facing an issue while setting up Single-On, check out the post at Salesforce Ben
Need help with Single Sign-on setup?
Contact us at salesforcecodex@gmail.com with your use case or order at Fiverr.
References
Related Topics
- Salesforce Integrations
- Configure SAML Single Sign-on between two Salesforce Orgs
- The Ultimate Guide to Automate Data Ingestion in Salesforce Data Cloud with Zapier
- How to Correctly Publish Platform Event Using Salesforce Apex
- AWS Signature 4 Signing in Salesforce
- How to Elevate Your Career to Salesforce Architect
- Salesforce Architect Guide to Mastering APIs for Scalable Integration
- Build Scalable Solutions with Salesforce
- Understanding the Salesforce Well-Architected Framework to Enhance Business Outcome
- The Ultimate Guide to Data Cleanup Techniques for Salesforce
- Steps for Successful Salesforce data migration