We use Salesforce files to store documents in our org. Sometimes we need to transfer these Salesforce files to some other cloud storage like AWS S3, Microsoft One Drive, Box, Dropbox, Google Drive, etc. This post will give step-by-step information on Salesforce DropBox Integration to upload files. We can also use AppExchange product for the standard approach.
We have already done integration with AWS S3 and Microsoft One Drive. Let us see Dropbox integration for uploading files in this post.
Read More: The Ultimate List of Salesforce Integration Resources
Steps for DropBox integration
- Create Dropbox Account (Skip if already have)
- Create App for Developer
- Setup Application for File Upload
- Generate Access Token
- Create Apex Class to upload files
- Test Integration
1. Create DropBox Account
Create a free DropBox account to test integration. If you already have a DropBox account then you can skip this step.
Click on the link https://www.dropbox.com/plans to create a free personal trial account or you can try 30 days free business account from link https://www.dropbox.com/business/try.
Once the account is created and verified, we can proceed with the next step of app creation. You can see your account information at https://www.dropbox.com/account/general after verification.
2. Create App for Developer
As we need to integrate DropBox with Salesforce, we need to provide access to development. We have to create an App for developing code with DropBox.
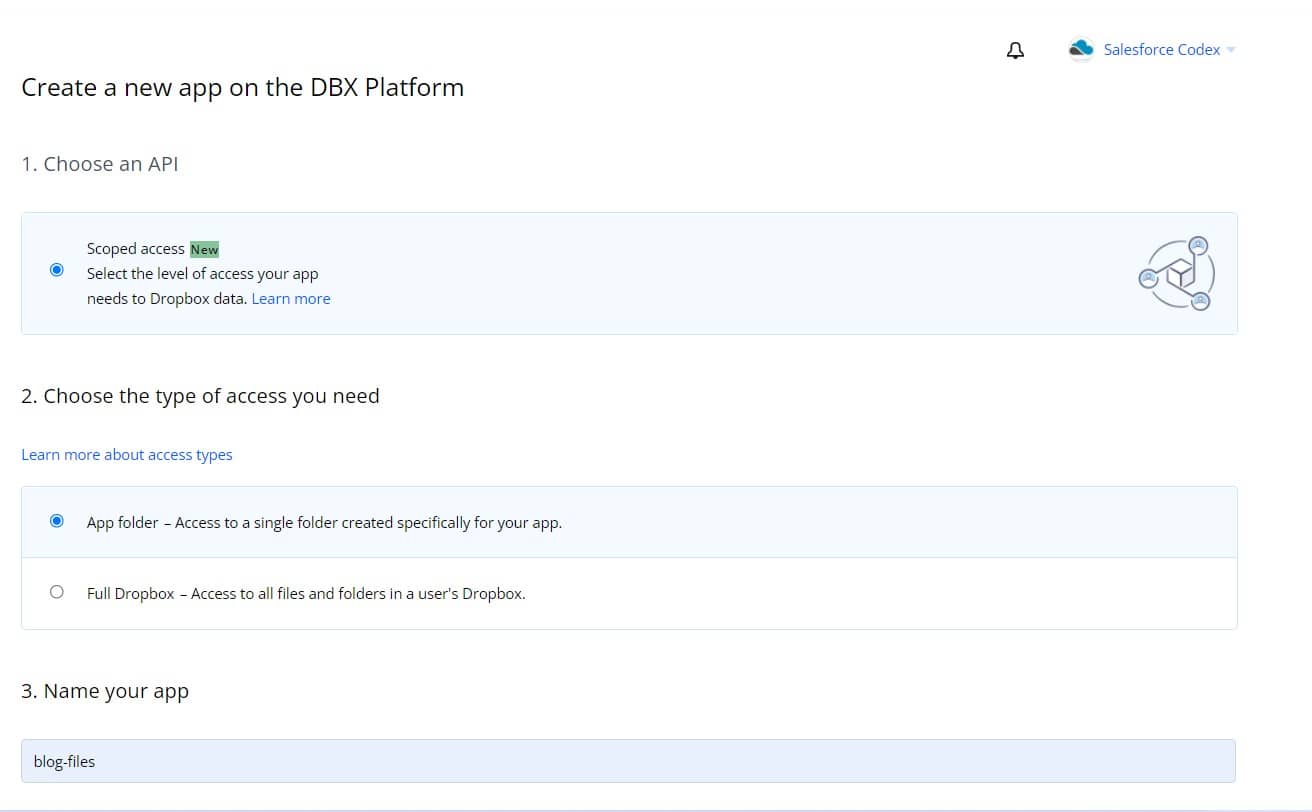
Open link https://www.dropbox.com/developers/apps for a developer account. You can use the same credential for this page also. Create App by clicking on Create App button. Add configuration based on your requirement or you can do similar to the attached image.

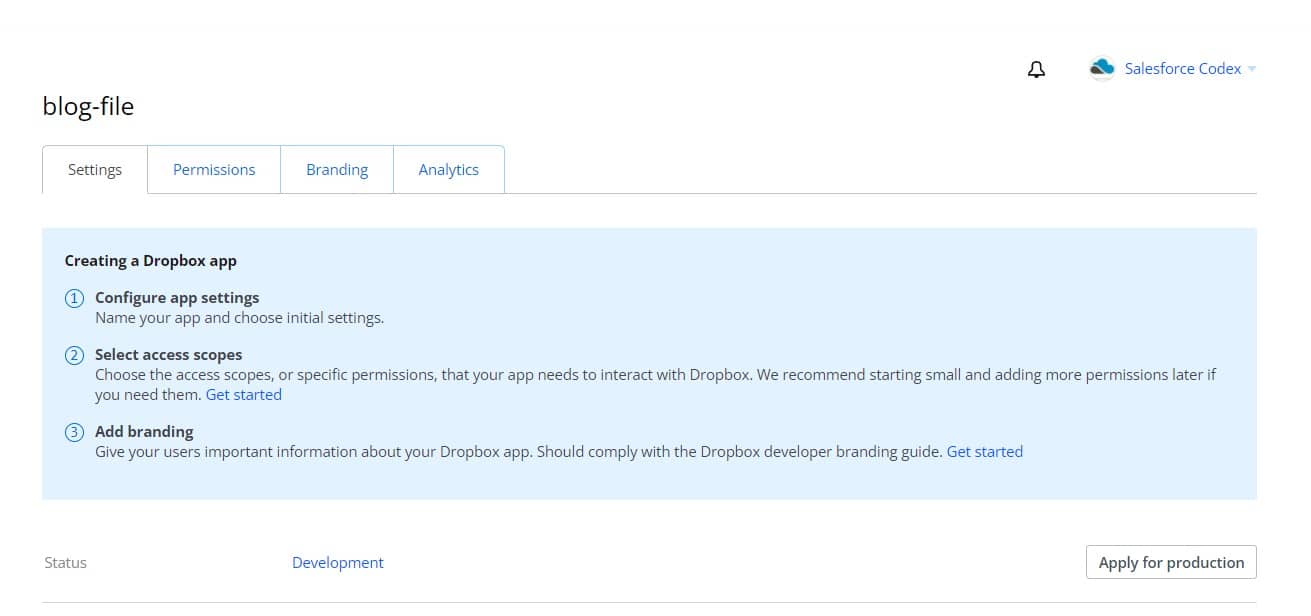
Once you create an app, you will see the application configuration screen similar to the below image.

3. Setup Application for File Upload
Now we have to configure this application so that we can upload, create or delete files from the dropbox folder. Without giving this access we can not upload, delete files.
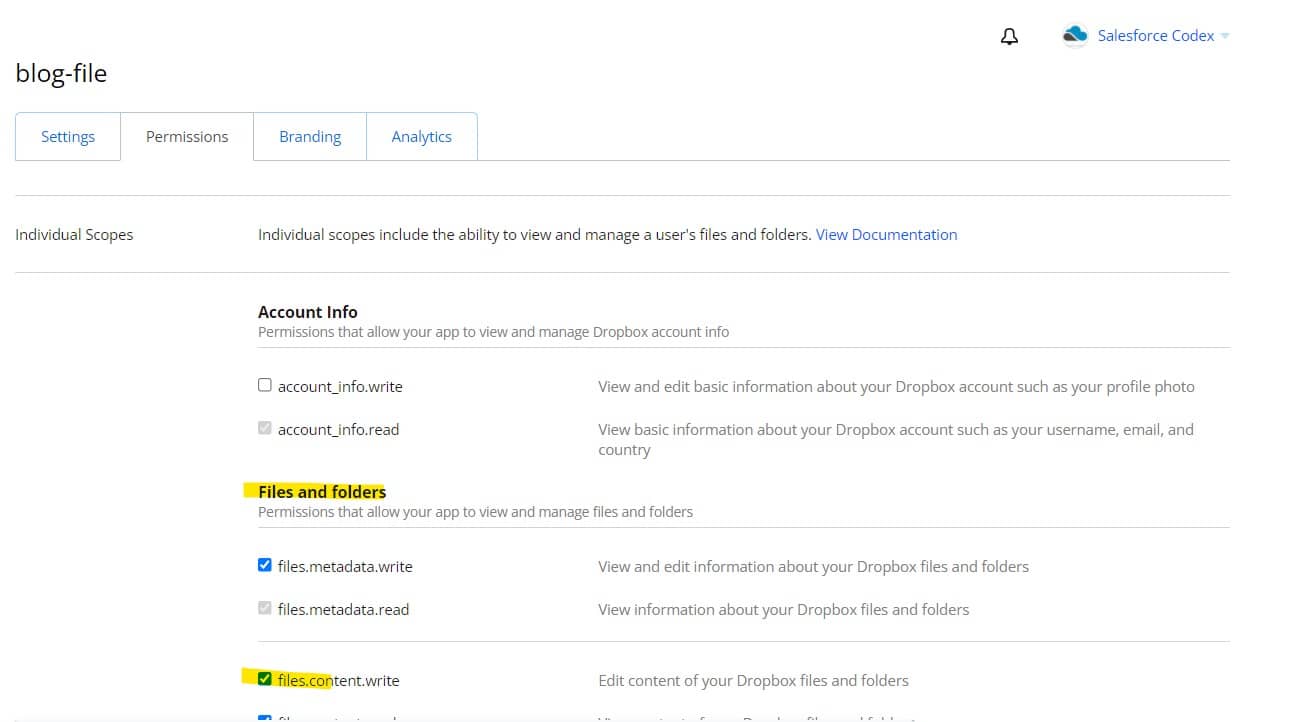
Click on the permission tab to configure permission for the app. In the File and Folders section, enable files.content.write permission and Save these changes.

4. Generate Access Token
As we have now configured permission, now we can generate an access token that will be used in API integration. This step should always be done after setting app permission. If you already generated a token and later changed permission then we have to re-generate the token. Without regeneration, we will get authorization failure errors.

Click Generate button on Generated access token section in the Setting tab. Copy this access token and save it for later use. We can store the access token in custom settings, custom metadata, or Custom labels. Based on your organization’s application architecture, store access token. For demo purpose, I am using a custom label DropBoxKey.
5. Create Apex Class to upload files
Now we have completed the DropBox setup, Let us create an Apex class to upload files.
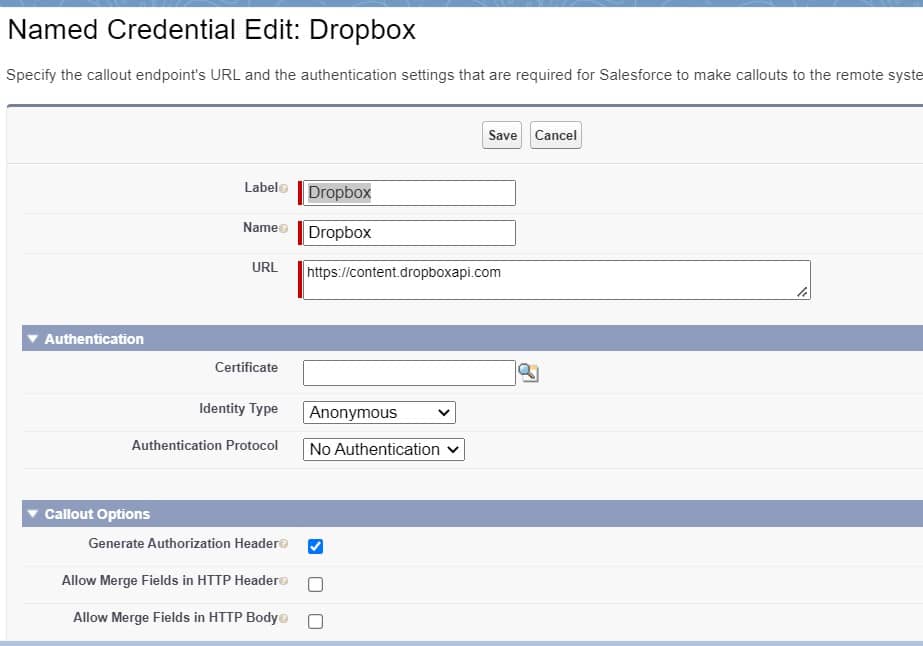
For integration, we have to use file upload API (https://content.dropboxapi.com/2/files/upload) from Drop Box API. We can use Named Credential for saving this endpoint.

Apex Code:
Apex Service Class for DropBox:
This class is used to upload files using DropBox API.
Apex Controller Class to Use DropBox service class:
This class is used to get file details from Salesforce object record and upload that file using the above created DropboxService class. After the file is uploaded, we can store the file’s location in the FileStore__c object for later use.
6. Test the above code
Let us test the above code. We can call DropboxController from an apex method or we can create one invocable method which can be called from the flow action. You can refer our post Cuttly Url Shortener in Salesforce for creating invocable method (class CuttlyServiceInv).
Code to test functionality from Developer console is
DropboxController.uploadFileByRecord('0012v00003JMBTqAAP'); //0012v00003JMBTqAAP is Account record where file is attached
