Partner Portal is required by our clients to provide access to Salesforce data to their employees. These employees can have different types of access based on their partner role. In this post, we will learn about how to create partner portal user in Salesforce community.
To create a Partner Portal user we will need a Partner Portal license. If your company has this license then well n good otherwise you can ask for a courtesy license from the Salesforce account manager.
As already mentioned based on different partner user roles, we should provide access to Salesforce data. In Salesforce we can have a maximum of 3 roles Partner User, Partner Manager, and Partner Executive. These roles are automatically created with the account name on the first partner user creation. So if our Account Name in SFDX and role is set 3 then SFDC Partner User, SFDX Partner Manager and SFDX Partner Executive role will be created automatically.
Steps to create Partner portal User
- Create an Account and Contact
- Create Partner Portal Profile
- Setup Portal Role count in Experience setting
- Create a custom LWC registration component
- Setup Custom LWC on registration Page
- Test functionality
Let us go through each step one by one
1. Create an Account and Contact
To create a partner portal user, we have to create a business account first. Then create the business account’s employees as contact with that business account. Put some kind of indication for the type of employee in the contact object like ContactType. Add this custom field in the contact object as a picklist with the value of User, Manager, and Executive.
2. Create Partner Portal Profile
Create a new custom profile from standard partner profile (Partner Community ) and provide accesss of objects based on your requirements. We can use Partner Community Login User profile also but this is standard profile and if you want to change access of different objects to different community portal then it will not possible. So it always better to create new profile like below image.

3. Setup Portal Role count in Experience setting
Set the default number of roles created when adding partner or customer accounts to Experience Cloud sites. The limit is three roles; and by default is one. For example, if three partner roles are currently created when an account is enabled for your site–Executive, Manager, and User but we need only the User role for new accounts, we can reduce the number to one role.

4. Create a custom LWC registration component
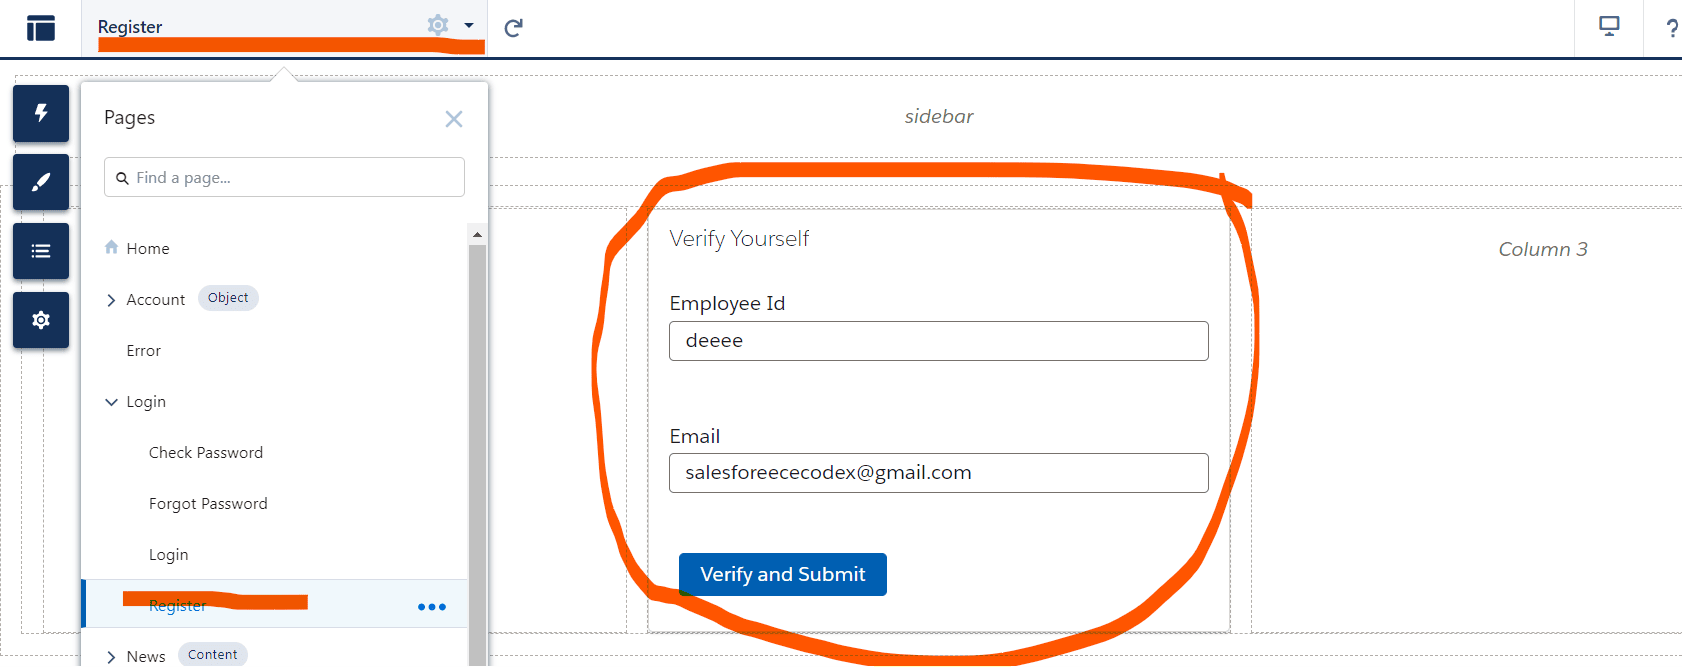
Create a custom LWC component for creating a partner user from Contact. This component will be added to the Registration page of the Experience cloud builder page to get few information from partner users. On the verification, the user will be created based on ContactType.
For this blog, I am just using EmployeeId and ContactEmail for verification so only these 2 fields will be created in LWC. It can be different for your requirement, so change it based on your requirement. In code, I have used custom toast. You can get custom toast code from post Custom Toast with custom duration In LWC
LWC Code:
Apex Code:
5. Setup Custom LWC on the registration Page
Once custom registration LWC is created, we have to put this LWC on the registration page of the experience builder site. To set up this go to Setup->Digital Experiences ->All Sites- Select Site and click Builder
From the Login page, select the register detail page and add a custom registration LWC. Once it is added to the page, preview and publish this for testing.

6. Test functionality
References:
Create a Partner Portal, Enable Partner Account and Users, and Add Members
Create Customer Community User in Salesforce Apex
Portal Related Posts
Create Customer Community User in Salesforce Apex


1 Comment
Pingback: Salesforce Launches Sales Cloud Unlimited - Salesforce Codex - Stories